Hennaing your hair for the first time is exciting, but may also feel overwhelming because there is so much conflicting information on the internet. If you’re using Ancient Sunrise® henna, then you can follow this short guide to be more successful at coloring your hair. Here are 5 tips to avoid a henna mishap.
If you are using a fruit acid powder, such as citric acid or Amla, you’re going to need water. Distilled is best because it is free of minerals. Minerals can cause the dye molecules to shift to undesirable shades or be inconsistent. RO or reverse osmosis water may work in a pinch, but can still contain minerals especially if the proper upkeep is being neglected. If pipes have rust or other buildup in them, this can impact the water, too. Distilled water helps with consistency.
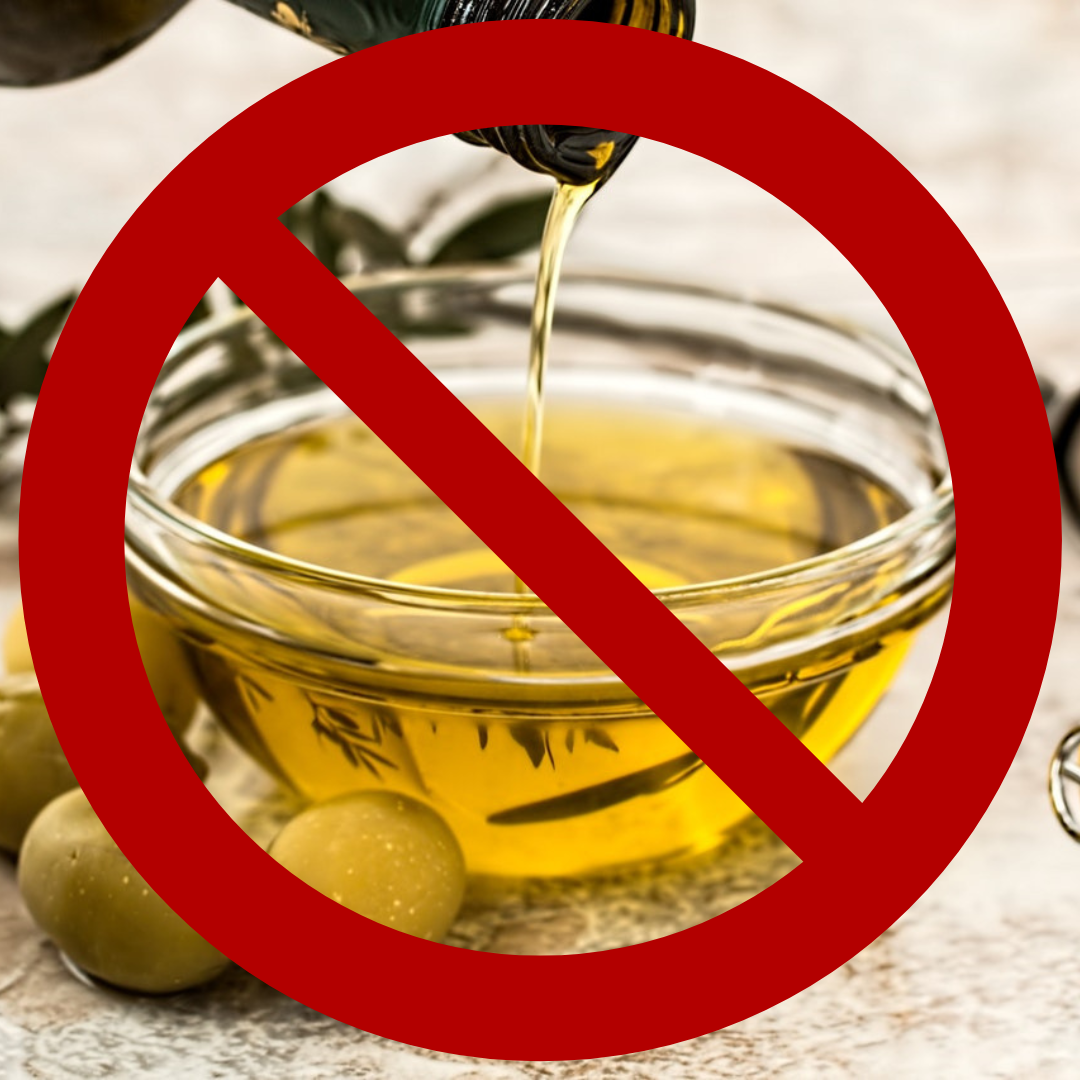
3. Leave out the oils.
Oil is not meant for henna for hair.
Oils can have a pleasant smell. They are wonderful in lotions, hair perfumes, and more, but do they have any benefit to henna? Nope. While oils high in monoterpene alcohol can help a henna stain be darker on the skin, it can do the opposite on the hair. Too many additives in general can prevent a good uptake, but oil is a major culprit. If you want something to mask the smell, ginger root powder or cardamom seed powder works great in henna. Basically, adding oils to your mix will cause you to waste your time and money.
4. Apply to clean hair
Clean hair allows the henna to stick a lot better.
Not only do you want to leave out oils and minerals out of your henna mix, you also want to remove them from your hair before your application. Using a clarifying shampoo or Rainwash treatment will help remove build up. While clarifying shampoo will remove oils (as long as it’s not “hydrating” or “moisturizing”), Rainwash will not. You can use Dawn dish soap to remove excess oils after Rainwashing. For best results, get rid of all speed bumps that slow you down from getting your desired color.
5. Avoid caffeine in your henna.
Skip the coffee..
Skip the coffee and caffeinated teas in your paste. There is no added benefit from these ingredients and the caffeine can give you a headache. This is because the caffeine is able to get into the bloodstream through the scalp. Plus, the smell of henna and coffee is kind of gross. Caffeine in your henna is a great way to get some extra jitters, but nothing else.
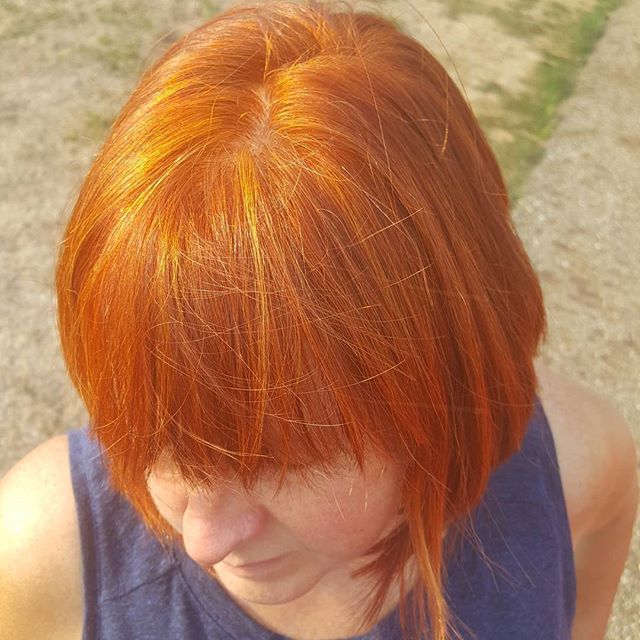
Is henna bad for hair? So many people ask this question, but here it will be answered in a few different parts, because pure henna, is great for the hair, but adulterated henna is bad all around.
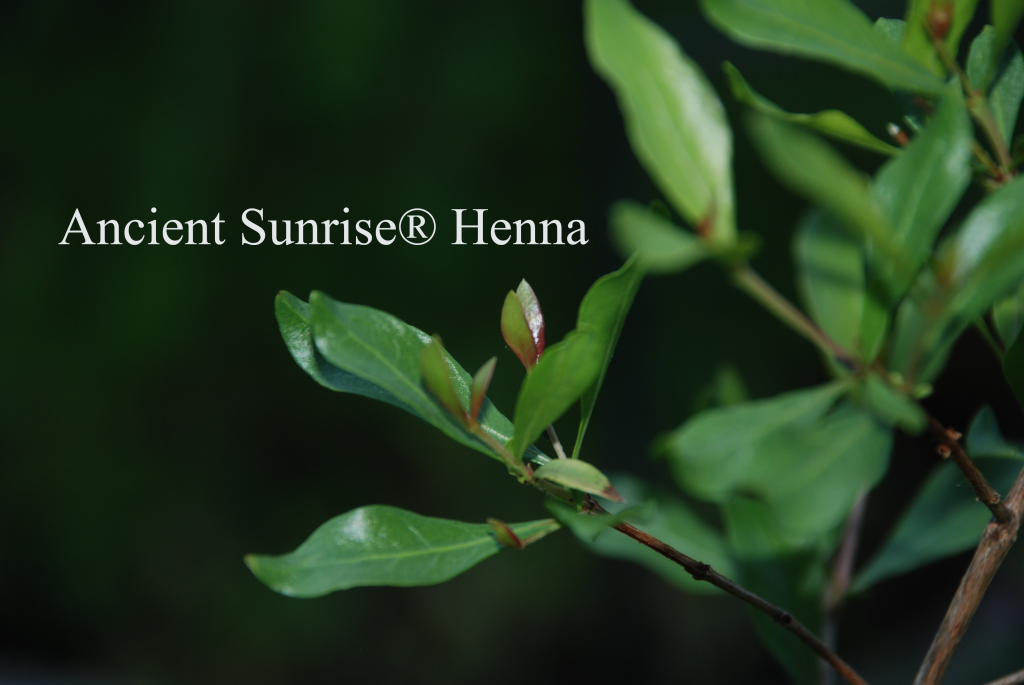
Pure henna is actually great for the hair! You can find the benefits of using henna here. Henna not only colors hair, but it can protect the hair from UV rays, chlorine, and more because of the tannins naturally found in the lawsone.
If you have hennaed your hair and aren’t a fan of the red, or if you just want to tone your hair down a bit, this blog may be for you. Even if you’ve done a combination of henna and indigo and/or cassia, you can still use indigo and cassia to tone.
What is toning?
If you’re familiar with “henna gloss” or “indigo gloss,” then you’re already familiar with the idea of toning. Toning is a way to alter your hair color from the current color. It’s called “toning” because you’re fine tuning your hair color by adding the missing pigment that will help you get the color that you’re looking for. People tone or do glosses for many reasons, but the biggest reason is because their hair may have come out brighter and/or lighter than expected.
Toning can also be beneficial if you’ve made a mistake in your mix, such as using too much henna, accidentally leaving indigo out your mix, or even correcting a mix where the indigo had demised.
Hair Prep
All of the mohair being used for testing has been prepped with a clarifying shampoo before applying henna. For Test 1, the indigo/cassia mix was applied the same day that the henna past was removed. For Test 2, the indigo/cassia mixes were applied 7 days after the henna paste was removed.
Mix Prep
In all cassia/indigo mixes, both Clarity cassia and Sudina indigo powders were mixed in the same bowl, and distilled water was added. The paste was applied to the hair samples immediately after mixing each set of powders.
Test 1 – Toning Henna before Oxidation
Control
I used 20% indigo to 80% cassia on freshly hennaed hair that hadn’t oxidized for mix A. The goal was to see if the hair would be different than applying a toning mix to hair that has oxidized, mix B. I did notice a difference in the tone.
Note:Due to the lack of difference in color, I did not do a mix for 15 minutes when making mix B for this particular ratio.
When I compared these test pieces to hair that had been toned after letting the henna had oxidized, I noticed that even though that mix A, despite having more indigo and less cassia, didn’t come out darker than mix B. The test pieces that only had the mix on for 30 minutes are quite comparable (off camera, the pigment in mix A is slightly more brassy and doesn’t have as rich of a red as mix B for this timing).
There will be another blog in the future comparing more on toning freshly hennaed hair in detail, as this yielded interesting, yet unexpected results.
Test 2 – Toning Henna after Oxidation
Test 2 mixes. Top left big chunk of hair is the control.
Mix 1
10% indigo; 90% cassia
A 30 minutes
B 60 minutes
Mix 2:
25% indigo; 75% cassia
C 30 minutes
D 60 minutes
Mix 3:
50% indigo; 50% cassia
E 15 minutes
F 30 minutes
G 60 minutes
Mix 4:
75% indigo; 25% cassia
H 15 minutes
I 30 minutes
J 60 minutes
Mix 5:
90% indigo; 10% cassia
K 15 minutes
L 30 minutes
M 60 minutes
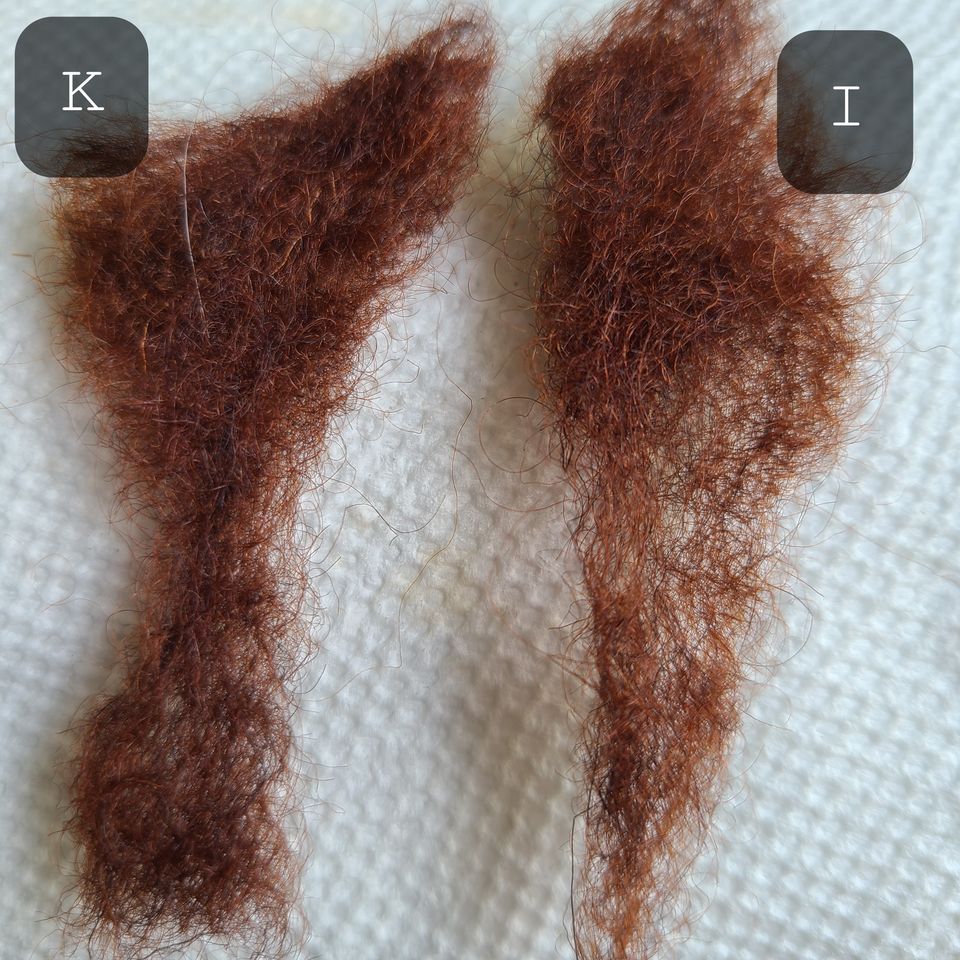
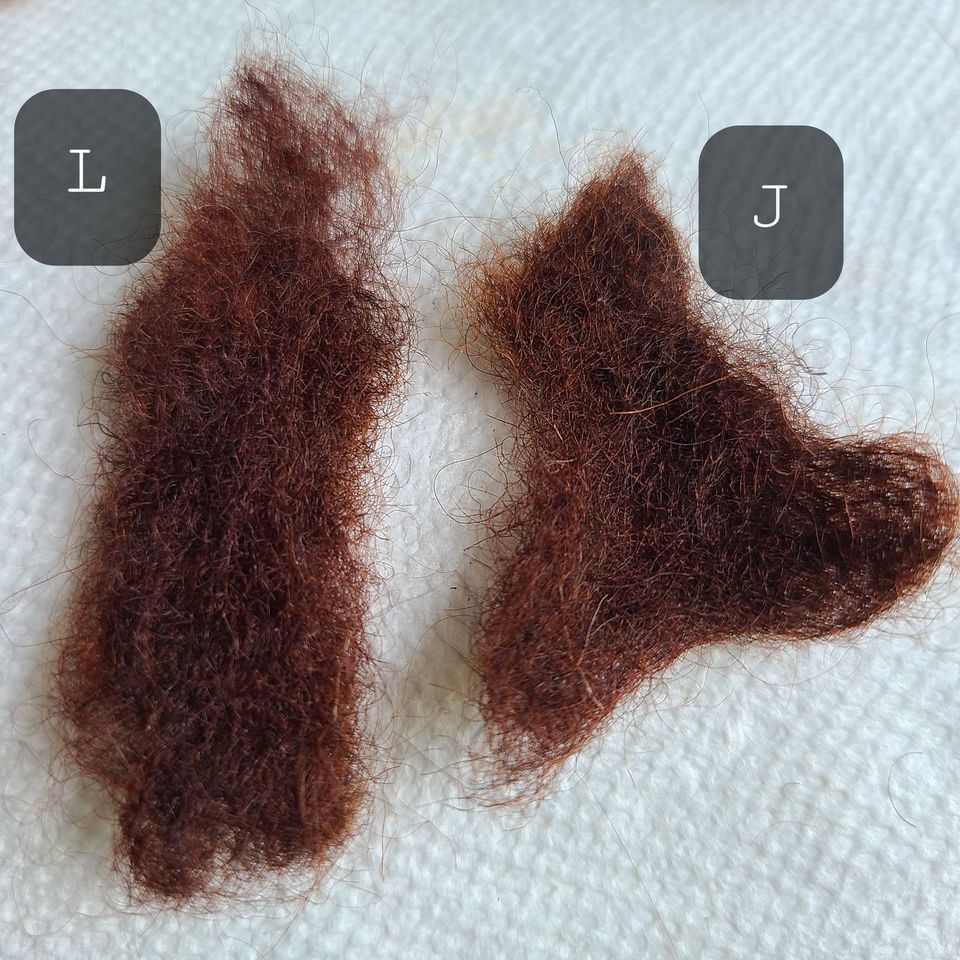
There are a couple of strands that have similarities such as test pieces K and I as well as L and J.
K is 90% indigo and 10% cassia that was left of for 15 minutes, where as I is 75% indigo and 25% cassia for 30 minutes. L is 90% indigo and 10% cassia that was left on for 30 minutes, where as J is 75% indigo and 25% cassia for 60 minutes.
The benefit of having two mixes with different timing that have similar results is that if you take a long time to apply paste your hair, you can always start with the mix that is the longer time for the first part of the application, then switch to a mix that needs less time to process. IE: If you’re trying to tone bright hennaed hair to a dark brunette, and it takes you a half an hour to do your root area, you could do mix I for the first part, then about half way through switch to mix K. This will allow for an even color.
If your hair continuously comes out more red than you’re looking for, you can definitely use a mix of indigo and cassia to tone it down to a darker shade. Customer service can help you determine the best ratio and timing for your hair! Testing is always a good idea to prevent your hair from going darker than you’re wanting.
You’ve planned out your morning and it’s the perfect time to henna…except *screams in horror* you forgot to mix up your paste ahead of time! Whether it’s work, parenting, your lifestyle, or all of the above, finding time to henna can feel difficult, but it doesn’t have to be. You’ve got enough going on; read below to find ways to make henna fit into busy schedule.
Tips for Finding Time to Henna
Prepping Tip #1
When I know I need to prepare paste, I set aside the items I need while I think about it, even if I don’t plan on mixing up stuff for a few days. I’ll get my distilled water jug, fruit acid powder, whisk, plastic wrap, and henna together and just put all of the items in a bowl and set it near where I plan on mixing it.
This not only makes it easy when I want to do the mixing, but it also gives me a visual reminder.
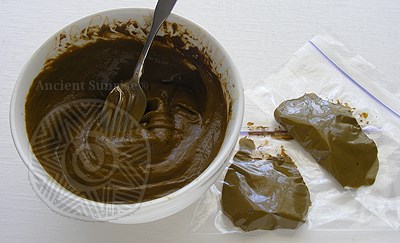
Mix up a big batch of your henna and/or cassia powder and let this sit for 8 to 12 hours when you know you have 10 to 20 minutes to spare. You can do this before you go to sleep or when you wake up.
When the paste is done dye releasing, put it in a zip lock bag, flatten it out, and throw it in the freezer. You’ll just have to defrost it when you’re wanting to use it, which generally takes less time than dye releasing. Flattening the bag you stored the paste in, will help the thawing process be much faster.
If you use indigo with your mix…
You can still mix up a big batch of henna/cassia, but you’ll want to measure it out first. For example, if you use 10 tablespoons of henna (70g), you could measure out three separate bags, each with 70g of henna powder made into a paste. Watch the video below to see how you can save on using a lot of dishes. This method works great with reusable bags, as well!
Prepping Tip #3
It is important to note that while heat can speed up dye release, you should be careful. Too much heat can compromise your henna/cassia.
There are a few ways to speed up dye release. You can place your henna/cassia paste in a hot car for a few hours, place it outside in the sun on a hot day, or even place it in a room that heats up nicely from your heater. Starting on page 10, you can see charts for how long to leave henna paste in different temperatures: http://www.tapdancinglizard.com/AS_henna_for_hair/Chapter_7_Mixing_and_Testing.pdf
I’ve placed henna near space heaters for a couple of hours, rotating and mixing every 30 minutes and doing a little stain test (how to test: drop a bit of paste on a clean finger tip and leave it for 5 to 10 minutes – if you get a stain, it’s good to go). This works well, but you do have to carefully monitor the paste.
Prepping Tip #4
Instead of heat, you can do easily do the opposite with cooler temperatures. If you’re concerned about missing dye release or aren’t home enough to check on your paste to prevent missing the dye release, you can mix up your henna/cassia paste and immediately place it in the fridge and it will be ready to use in 2 weeks.
Application Tip #1
Just do your hairline and part line. If you’re in a time crunch, you don’t need to worry about all of the hair the people can’t see. A lot of our customers will touch up the roots around the hairline, their part line, and anywhere else that may be exposed and then get the roots all over on the next root application.
The trick is to look at how you mainly style your hair and apply where you see those roots.
Application Tip #2
Utilize one method for touching up the roots and stick with it. Getting adjusted to doing your hair can take time. If you’re a busy person, it’s important to stick with the same method so that you get faster each application.
Application Tip #3
Clean as you go. Keep one or two hand towels near you to wipe up any mess that may occur while you’re doing your application. Removing fresh paste off of a surface is so much easier and quicker than removing dried paste.
Processing Tip #1
Henna and/or Cassia (no indigo)
You can sleep in your paste. If finding time to henna is nearly impossible this tip may be for you. Lay down a towel over your pillow, apply some medical tape around your plastic wrap, and fall asleep. You can wash your hair in the morning.
Henna and/or Cassia with Indigo
It’s best to not leave indigo on past 6 hours to prevent the henna from taking over, but you can still take a nap if needed.
Two step
If you do a two step process for jet black, then you can sleep with your henna one night, and indigo the next night.
Processing Tip #2
Find a really cool scarf or hat that you can put over the plastic wrap. This is easy to do when it’s cold out, because a knitted cap covers the plastic so well. I’ve gone to the store with my paste on and no one knew. In warmer weather, a scarf can look really nice and cover the plastic really well. It may take some practice getting the scarf tied the way you like, but it’s realistic.
This can make it so you can still go to the store, or take your kids to the park, or even go on a walk.
Processing Tip #3
Make sure your paste is a good consistency, is applied thickly in thin sections, and covers everything nicely. It may seem odd to reiterate instructions, but the instructions are written to help you get consistent coverage every application. If you try skipping steps to speed things up, it can actually slow you down or worse, cause you to have to do a whole other application.
Processing Tip #4
Multitask! If you work from home, or in an office where you’re not face to face with the public, wear your henna to work and wash it out on a break or after your shift. You can leave your paste in when you work out, clean your home, make dinner, shop, work, help your kids with their homework etc, or all of the above. You know your limits, so work within those. If your boss says you can’t come to work with a hair full of goop or if your henna starts to leak on your kids homework…maybe don’t do those things, but you get the idea ;).
Processing Tip #5
This is the most important tip, because if you’re having trouble finding time to henna, you’re likely having trouble finding time to treat yourself. Make a date with yourself. Pamper yourself at the same time you do your hair. Whether you do a facial, paint your nails, give yourself a manicure or pedicure, take a bath…you deserve it. Self care is so important to our mental health as well as our physical health. As adults, we have so many responsibilities, but sometimes we forget that we still need to take care of ourselves.
While these tips may not work for everyone, hopefully one of these can help you find a time to do your hair with a busy schedule.
Maria • Ancient Sunrise Specialist • Licensed Cosmetologist
Doing your hair at home can feel liberating, but it can also feel challenging at times. The problem is the items available for doing your own hair at home are low quality, bad for your hair and skin, and don’t work as well as salon products…but you can do your hair at home with Ancient Sunrise®.
Ancient Sunrise® is a brand of plant powders that are used to quite literally dye hair. Sure, the process is a little longer, but the results alone are worth it. The quality of the powders are better than any professional products I’ve used on clients. The color last longer, it’s more vibrant, and the hair gets conditioned instead of damaged. Ancient Sunrise® is available to both professionals and nonprofessionals because it’s that safe and that awesome.
If you’re feeling lost, don’t worry. Our amazing customer service team can help you out. Our email is helpdesk@mehandi.com.
Take a photo of your current color of your roots and a photo of the rest of your hair in natural lighting (avoid filters).
Next, find an image on a search engine or a photo you already have, take a screen shot or save the link.
Finally, send us an email with the images attached. Be sure to include “Help choosing a mix” or something of the like in the subject or body of the email.
We’ll not only be able to recommend a sample kit or test formula to try, but we can also let you know if the color you’re looking for might not be obtainable with our products.
Science!
Doing your hair at home with Ancient Sunrise® doesn’t have to complicated. We have a ton of information available at Mehandi.com, as well as our AncientSunrise.Blog. We even have videos on YouTube and Vimeo!
If you’re struggling or just feel overwhelmed, just give our customer service a call (330-673-0600), email us (helpdesk@mehandi.com), or chat with us on Mehandi.com. We love helping people get the color they desire and we have no problem going over the steps you need to do your hair yourself.
Doing the Thing
When you’re ready to dive in and do your hair, just remember you got this! It generally takes a few times of doing your hair to get adjusted. Refer to this article about touching up roots in the back of your head for some tips and tricks to make it easier. The video below shows how to section your hair.
Treat Yourself
Treat yourself at home by turning doing your hair into a spa day. Throw on your most comfortable clothes, apply an amla mask, play your favorite music, read a book, or just take a nap. Selfcare is important, and there is no reason to deny yourself this necessity. Doing your hair at home with Ancient Sunrise® can be a calming experience.
It’s Safe
When you use Ancient Sunrise, you can cuddle with your pets, kids, partner or even your favorite blanket without worrying about dangerous chemicals getting everywhere. Ancient Sunrise® is free from additives, PPD, and other adulterants found in compound henna, and boxed dye. It smells earthy and stays contained in plastic wrap on your. If a little drip gets somewhere, simply just wipe it up.
Doing your hair at home can be convenient, safe, and you can easily turn it into a luxurious experience. While it’s not the same as going to a salon and having someone wash your hair and apply your paste for you, it’s a good way to save money and use safer products if your salon doesn’t offer Ancient Sunrise®.
Maria • Ancient Sunrise® Specialist • Licensed Cosmetologist
One of the biggest challenges we hear that people have is touching up roots in the back of the head. Applying paste to areas that you cannot see can feel frustrating, overwhelming, and messy. It takes practice to become a master of touching up roots in the back of the head, but that doesn’t mean you can’t do it.
Tip #1: Clean Sections are Important
Sectioning your hair will help you be more organized and precise with your application. This alone can be very helpful with setting yourself up for a successful root touch up. Below is a video that goes over how to section your hair:
When grabbing hair, it should be 1/4 of an inch thin or thin enough to read a newspaper through. This amount of hair will allow the paste to get on every bit of hair, and will prevent a spotty application.
Further more, with clean sections, you’ll be able to find the next following subsection a lot easier.
Tip #2: Try not to goop your product on your hair
I don’t know how many times I hear or see people glopping on different forms of hair color, including henna. If that works for you, that is totally okay, but if you’re new or trying to cover up every bit of roots, this method is no good. I’ll admit, even though I am a stylist, I’ve gooped heaps of indigo on my roots out of desperation before, because I was tired and wanted to go to bed. I knew better, but I was already committed and down to the last section of hair in the back. I ended up having to redo most of my hair the next day, which was frustrating, but it was my own fault. In addition to not getting the coverage I wanted, I made a much bigger mess than usual, which caused me to have to clean a lot more.
Why “gooping” isn’t Effective
When you apply your paste in goops, you’re clumping hair together and missing sections. You’re also overlapping, which is totally okay if you don’t mind the rest of the hair getting darker. This can also cause someone to use way too much product and be really messy.
You’ll find it harder to pull up your next subsection because the paste from the previous subsection likely will have spread to other parts of the hair. When paste gets on parts of the hair that you’ve not gotten to yet, it will dry and make hair stick together. This can be annoying and painful. Plus it makes the application take longer.
Tip # 3 Utilize Mirrors
Mirrors can be your best friend for touching up roots in the back of the head. The down fall is hand free mirrors can be expensive.
There are moveable hands free mirrors that have an arm that connects to a wall. They cost $30-$40 and can be helpful if placed across from a bigger mirror, such as a bathroom mirror. You’ll want to figure out the best placement before drilling the holes in your wall, just to make sure that you can see the back of your head nicely. If you have a lot of space between your bathroom mirror and your wall, this trick may not quite work.
There are stand alone mirrors with wheels that could act in place of a bathroom mirror, but these tend to be $100+. The investment may be worth it, depending on how much you struggle with doing your application and how often you touch up your roots.
Finally, you could possible rig your own mirror on a stand. This should be done carefully, but if you enjoy DIYs, this may be the best route for you!
Tip # 4 Lighting
Good lighting s important when touching up your roots. LED lights are bright and helpful when trying to do your application, because it will allow you to see every nook and cranny.
It’s helpful if the light is mobile so that you’re able to change the lighting placement. This is excellent for areas on the head that are a little more difficult to see, such as the back. A ring light on a tripod would work nicely since they are generally light weight and have the ability to move around to different angles.
Tip # 5 Practice, Patience, and Persistence
Mastering self root touch ups take practice, patience, and persistence. It’s definitely a realistic goal that you can master, but it’s important that you don’t give up. Give yourself time to adjust, especially if you’ve never done your own hair before. You’re using your muscles in a different way and stretching your arms in an unusual manner.
Have patience with yourself. It’s okay if you don’t complete a perfect root touch up right away. You’ll do better the next time and even better the time after.
Finally, persistence. Use the same method of touching up several times before giving up and switching how you do your touch up. Set a schedule for how often you’d like to do your roots and stick to it. Make it a self pamper day or evening!
Practice, patience, and persistence are key for doing a good root touch up. Sure, your first couple of times may not be the greatest, but if you keep up with the same routine, you’ll nail it in no time.
Tip # 6 Practice with Conditioner or Cassia
This goes with Tip #5! If you feel like you’re not ready to do the back of your head with your henna mix, then use a thick conditioner or cassia. Both are great for the hair and can help you gain more confidence in your application. Neither of these will alter your hennaed hair, so you can practice as much as you’d like.
Tip # 7 Utilize Towels
It’s important to wipe off your hands when you’re working with hair in the back of the head. Having messy hands will cause paste to get on other bits of hair and dry out. Dried out paste is hard to comb through and can just be a minor annoyance.
When I do my roots, I quickly wipe of my hands when they start getting paste on them. I keep a towel over my sink for this purpose, and another smaller, damp towel off to the side.
Tip # 8 Get Familiar with your Head
Get used to the shape of your head. Try closing your eyes and placing your hands on the back of your head. Feel the shape. Grab sections of hair to get adjusted to feeling the thickness of your hair. Visualize you applying paste the hair. Stretch your arms to the bottom of your hair line (the nape of your neck) a few times a week to help get these muscles adjusted to moving in a new way.
Doing a mock root touch up with nothing, except the utensils you plan on using (hands, carrot bag, and/or hair color brush) can help you get familiar was well. The two biggest challenges of overcoming touching up roots in the back of the head is 1) being able to apply paste in areas you cannot see and 2) being able to successfully feel where you need to separate your hair to apply more paste.
Tip # 9 Bribe a Family Member, Friend, or Spouse
Before getting to this part, I encourage you to keep trying. However, if all else fails and you just cannot get the roots in the back of the head, find a henna buddy, if you can do it safely. Sure, you may need to shell out a few bucks, a special home made dinner, or dessert, but it’ll be worth it! The touch up may not be perfect, but it can save you frustrations.
We have all had that moment when we set aside time to mix Ancient Sunrise® henna and/or cassia only to realize when we are about to start, that we are out of our powered fruit acid or liquid. Our brow starts to sweat, “Customer service is closed for the weekend. What do I do now?”
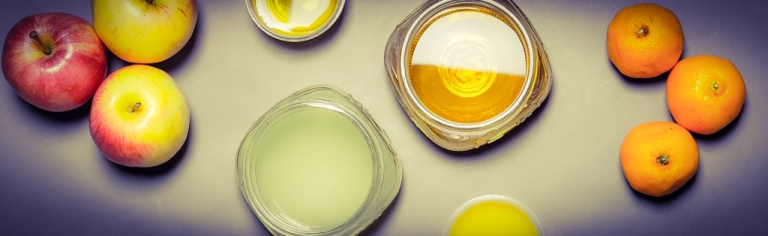
The good news is, you do not have to panic! There are other acids you most likely have around your home that can be used to dye release your henna and/or cassia paste. If you drink juice or have kids, you may have one of these on hand: apple juice, blueberry juice, cranberry juice, or orange juice. Bakers will typically have powdered cream of tartar or lemon juice on hand. Cooks will typically have apple cider vinegar or white vinegar on hand as well. Any one of these can be used for dye release.
Apple Juice – pH 3.4 (1)
100% juice can typically be found in the grocery store
Make sure the apple juice isn’t too mild. Some juices advertised to toddlers may be too weak to properly dye release your plant powders
Dye releases Henna and Cassia mixes faster than other fruit acids or juices (usually in 6 hours instead of 8 hours in 68°F – 72°F)
Very gentle on the scalp
Cranberry Juice – pH 2.3 (1)
100% Juice preferred
A juice cocktail will have more sugar and be sticky, but not unusable
If you use Copperberry fruit acid, this will be the best substitution in a pinch
Blueberry Juice – pH 3.2 (2)
100% Juice is preferred
A Blueberry/ Pomegranate blend will work nicely
If you use Amla or Night Fall Rose fruit acid, this is the best substitution
Orange Juice – pH 3.7 (3)
100% Juice with no pulp or calcium added works the best
If you use Kristalovino fruit acid, this will be the best substitution for you
Lemon Juice – pH 2.3 (1)
You can use bottled lemon juice
It does not have to be fresh-squeezed
If you use Malluma Kristalovino or citric acid, this may be a good substitution
If you have a sensitive scalp, this acid is not for you; use cream of tartar instead
You can dilute the lemon juice with distilled water
50% lemon juice and 50% distilled water works nicely
Vinegar – pH 2.4 (1)
Like lemon juice, white vinegar and apple cider vinegar can be watered down with distilled water
If you use Malluma Kristalovino or citric acid, this may be a good substitution
If you have a sensitive scalp, this acid is not for you; use cream of tartar instead
Vinegar mixes tend to brown henna more when finished oxidizing
This doesn’t mean you will get a brown color from henna. Your henna will not be as bright as using cranberry juice
Vinegar can make henna/cassia paste smell unpleasant
Tip
To dilute white vinegar, apple cider vinegar, or lemon juice, simply add equal parts distilled water to your acidic liquid.
In conclusion, there is usually an alternative fruit acid powder or liquid that can be used to dye release your henna and/or cassia paste.
If you have questions about a juice or powdered fruit acid, contact customer service: ☎️330-673-0600, 📧 helpdesk@mehandi.com, 💬 or chat with us on Mehandi.com.
Howard, Luke R.a; *; Brownmiller, Cindia; Mauromoustakos, Andy; Prior, Ronald L.a. ” Improved stability of blueberry juice anthocyanins by acidification and refrigeration.” https://content.iospress.com/articles/journal-of-berry-research/jbr133, Journal of Berry Research, vol. 6, no. 2, pp. 189-201, 2016, 10.3233/JBR-160133
Reddy, Avanija DMD, MPH; Norris, Don F. DMD; Momeni, Stephanie S. MS, MBA; Waldo, Belinda DMD; Ruby, John D. DMD, Ph.D. “The pH of beverages in theUnited States.” https://www.ada.org/en/~/media/ADA/Public%20Programs/Files/JADA_The%20pH%20of%20beverages%20in%20the%20United%20States, 2016 American Dental Association, jada.ada.org
When it comes to methods for touching up roots, it can be tough to know where to start. It’s a struggle to make sure to cover only the regrowth and definitely harder to get it perfect in the back. Even when you’re a licensed stylist, touch-ups on yourself don’t come easy.
In this article, I’m going to go over a couple of methods for touching up roots using your hands and a color brush. For my demonstration, I’m using Ancient Sunrise® cassia mixed with water and applied immediately. I did my application on a mannequin head to show a better view of how you can part your hair and apply the paste on the back section of your head since that is where people have the most trouble.
You want to make ¼ inch sections when applying your paste. I’m using bigger sections for demonstration purposes. I start by parting the hair into 4 sections and clipping the hair.
[table id=3 /]
Method: color brush
With a brush, you can be a little bit more precise on placement than applying the paste with your hands. If you use 2 mirrors, one in front and one behind you, it’s easier to see your sections in the back of the head. It’s no harm if you apply freely and go by feel since the roots on the back of the head aren’t as visible. Usually, bristles on a color brush are about an inch or 2 in length, the same length as the average regrowth, so that can be your guide.
[table id=2 /]
Method: Hands
Using your hand(s) to apply paste can be a bit messy, so if you’re okay with that, this method may be for you. For this demonstration, I’m not using a comb as it’s not needed. For some people starting at the top may be a better choice, which is where I’m starting for this method.
[table id=4 /]
Hopefully, my methods of touching up roots can help you when you’re ready to do your next root touch up. Everyone will find a way that can work best for them. Don’t worry if it will take some time for you to find your way. You got this! If all else fails, friends and family can always come in handy, if they don’t mind a little chatting and playing in some paste.


 Maria • Ancient Sunrise® Specialist • Licensed Cosmetologist
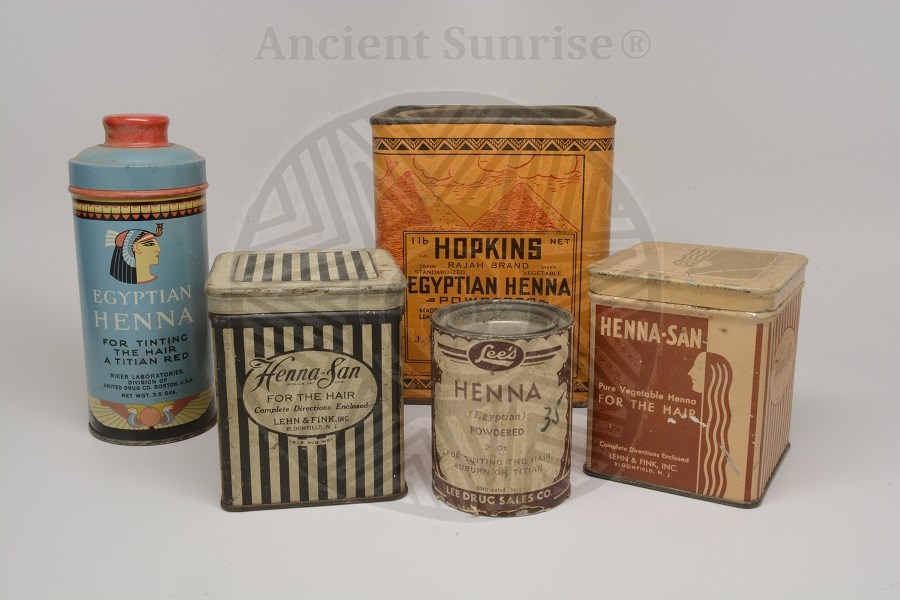


 Liz • Ancient Sunrise® Specialist
 Damaris • Ancient Surnise® Specialist • LPC