Touching up Roots in the Back of the Head

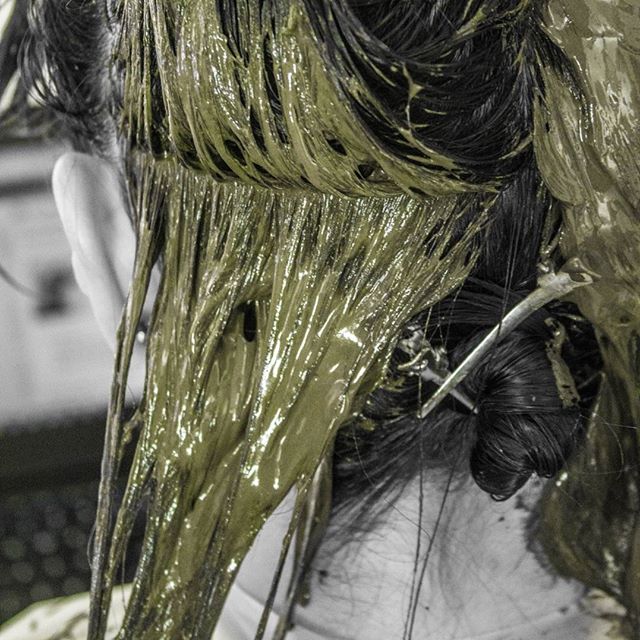
One of the biggest challenges we hear that people have is touching up roots in the back of the head. Applying paste to areas that you cannot see can feel frustrating, overwhelming, and messy. It takes practice to become a master of touching up roots in the back of the head, but that doesn’t mean you can’t do it.

Tip #1: Clean Sections are Important

Sectioning your hair will help you be more organized and precise with your application. This alone can be very helpful with setting yourself up for a successful root touch up. Below is a video that goes over how to section your hair:

When grabbing hair, it should be 1/4 of an inch thin or thin enough to read a newspaper through. This amount of hair will allow the paste to get on every bit of hair, and will prevent a spotty application.

Further more, with clean sections, you’ll be able to find the next following subsection a lot easier.

Tip #2: Try not to goop your product on your hair

I don’t know how many times I hear or see people glopping on different forms of hair color, including henna. If that works for you, that is totally okay, but if you’re new or trying to cover up every bit of roots, this method is no good. I’ll admit, even though I am a stylist, I’ve gooped heaps of indigo on my roots out of desperation before, because I was tired and wanted to go to bed. I knew better, but I was already committed and down to the last section of hair in the back. I ended up having to redo most of my hair the next day, which was frustrating, but it was my own fault. In addition to not getting the coverage I wanted, I made a much bigger mess than usual, which caused me to have to clean a lot more.

Why “gooping” isn’t Effective

When you apply your paste in goops, you’re clumping hair together and missing sections. You’re also overlapping, which is totally okay if you don’t mind the rest of the hair getting darker. This can also cause someone to use way too much product and be really messy.

You’ll find it harder to pull up your next subsection because the paste from the previous subsection likely will have spread to other parts of the hair. When paste gets on parts of the hair that you’ve not gotten to yet, it will dry and make hair stick together. This can be annoying and painful. Plus it makes the application take longer.

Tip # 3 Utilize Mirrors

Mirrors can be your best friend for touching up roots in the back of the head. The down fall is hand free mirrors can be expensive.

There are moveable hands free mirrors that have an arm that connects to a wall. They cost $30-$40 and can be helpful if placed across from a bigger mirror, such as a bathroom mirror. You’ll want to figure out the best placement before drilling the holes in your wall, just to make sure that you can see the back of your head nicely. If you have a lot of space between your bathroom mirror and your wall, this trick may not quite work.

There are stand alone mirrors with wheels that could act in place of a bathroom mirror, but these tend to be $100+. The investment may be worth it, depending on how much you struggle with doing your application and how often you touch up your roots.

Finally, you could possible rig your own mirror on a stand. This should be done carefully, but if you enjoy DIYs, this may be the best route for you!

Tip # 4 Lighting

Good lighting s important when touching up your roots. LED lights are bright and helpful when trying to do your application, because it will allow you to see every nook and cranny.

It’s helpful if the light is mobile so that you’re able to change the lighting placement. This is excellent for areas on the head that are a little more difficult to see, such as the back. A ring light on a tripod would work nicely since they are generally light weight and have the ability to move around to different angles.

Tip # 5 Practice, Patience, and Persistence

Mastering self root touch ups take practice, patience, and persistence. It’s definitely a realistic goal that you can master, but it’s important that you don’t give up. Give yourself time to adjust, especially if you’ve never done your own hair before. You’re using your muscles in a different way and stretching your arms in an unusual manner.

Have patience with yourself. It’s okay if you don’t complete a perfect root touch up right away. You’ll do better the next time and even better the time after.

Finally, persistence. Use the same method of touching up several times before giving up and switching how you do your touch up. Set a schedule for how often you’d like to do your roots and stick to it. Make it a self pamper day or evening!

Practice, patience, and persistence are key for doing a good root touch up. Sure, your first couple of times may not be the greatest, but if you keep up with the same routine, you’ll nail it in no time.

Tip # 6 Practice with Conditioner or Cassia

This goes with Tip #5! If you feel like you’re not ready to do the back of your head with your henna mix, then use a thick conditioner or cassia. Both are great for the hair and can help you gain more confidence in your application. Neither of these will alter your hennaed hair, so you can practice as much as you’d like.

Tip # 7 Utilize Towels

It’s important to wipe off your hands when you’re working with hair in the back of the head. Having messy hands will cause paste to get on other bits of hair and dry out. Dried out paste is hard to comb through and can just be a minor annoyance.

When I do my roots, I quickly wipe of my hands when they start getting paste on them. I keep a towel over my sink for this purpose, and another smaller, damp towel off to the side.

Tip # 8 Get Familiar with your Head

Get used to the shape of your head. Try closing your eyes and placing your hands on the back of your head. Feel the shape. Grab sections of hair to get adjusted to feeling the thickness of your hair. Visualize you applying paste the hair. Stretch your arms to the bottom of your hair line (the nape of your neck) a few times a week to help get these muscles adjusted to moving in a new way.

Doing a mock root touch up with nothing, except the utensils you plan on using (hands, carrot bag, and/or hair color brush) can help you get familiar was well. The two biggest challenges of overcoming touching up roots in the back of the head is 1) being able to apply paste in areas you cannot see and 2) being able to successfully feel where you need to separate your hair to apply more paste.

Tip # 9 Bribe a Family Member, Friend, or Spouse

Before getting to this part, I encourage you to keep trying. However, if all else fails and you just cannot get the roots in the back of the head, find a henna buddy, if you can do it safely. Sure, you may need to shell out a few bucks, a special home made dinner, or dessert, but it’ll be worth it! The touch up may not be perfect, but it can save you frustrations.

For more information on root touch ups, check out these links: https://www.ancientsunrise.blog/full-coverage-roots/ https://www.ancientsunrise.blog/how-to-measure/

You can always contact customer service for support! Visit https://www.mehandi.com/Articles.asp?ID=256

Maria • Licensed Cosmetologist • Ancient Sunrise Specialist

Full Coverage: How to Transition from Hennaed Hair Back to Natural Roots

While we’d love for you to stay with us forever, there are many reasons a person may choose to stop using henna, or to return to their natural hair color. You may simply miss your natural color, or expect to have less time or money for hair coloring in your future. Some women have decided to let their natural gray hair grow out. Silver locks are in fashion as of late. Because henna is permanent, it is common to see a noticeable line of demarcation as the hair grows, especially if your treated hair is different from your natural hair color. A frequently asked question regarding transitioning is how to do so without getting a stark contrast between colored hair and roots as your hair grows out.

            There are a few different ways to achieve a gradual shift. Because Ancient Sunrise® Henna for Hair products only add to the existing hair color, it is most likely that you will be going from a darker color to a lighter one. The exception to this rule is those who lighten their hair before applying henna. This article will cover techniques for both dark-to-light and light-to-dark transitions.

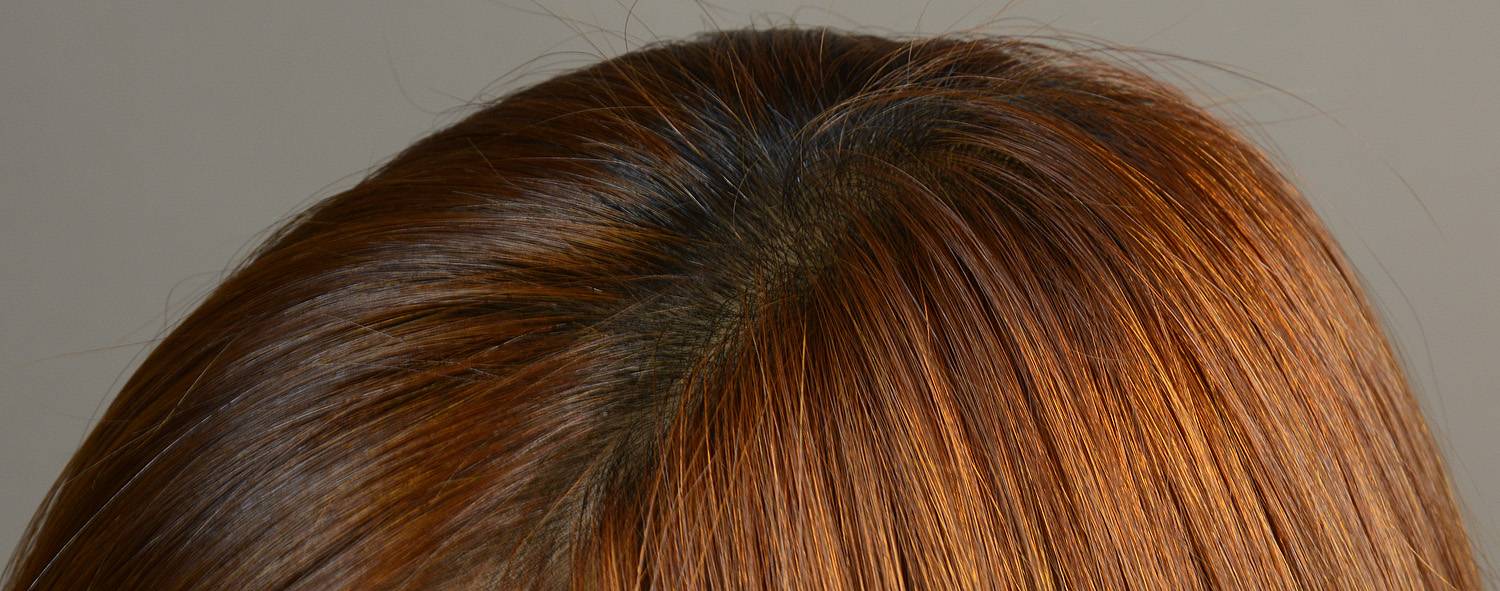
This hair has been lightened and then hennaed. The roots are black.

Transitioning to Lighter or Gray Roots

Henna as Lowlights

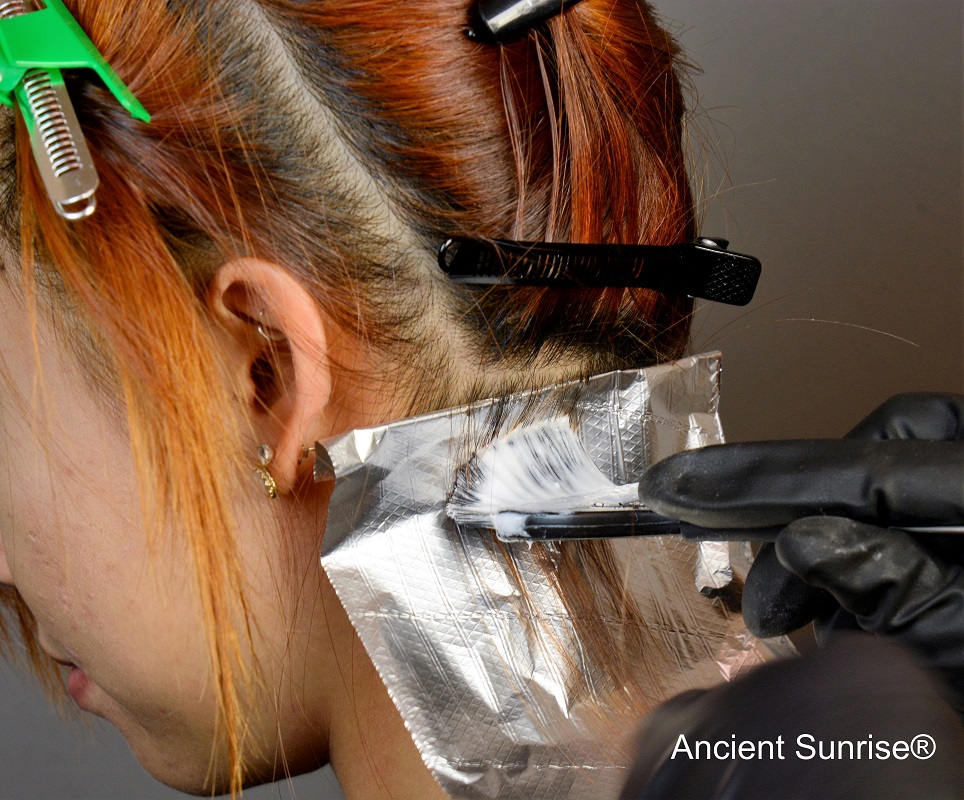
Rather than applying your mix to all of your roots, applying only in thin sections while leaving the remainder of your roots natural will create a highlight/lowlight effect with your natural color. You can ask a stylist to apply your mixture in foils, or you can do it yourself at home with a highlighting cap.
            A highlighting cap has holes through which to pull thin sections of hair while keeping the rest of the hair protected underneath. Pull through your desired sections, apply henna to those sections, and process as normal.  As your hair grows, gradually decrease your number of lowlights.

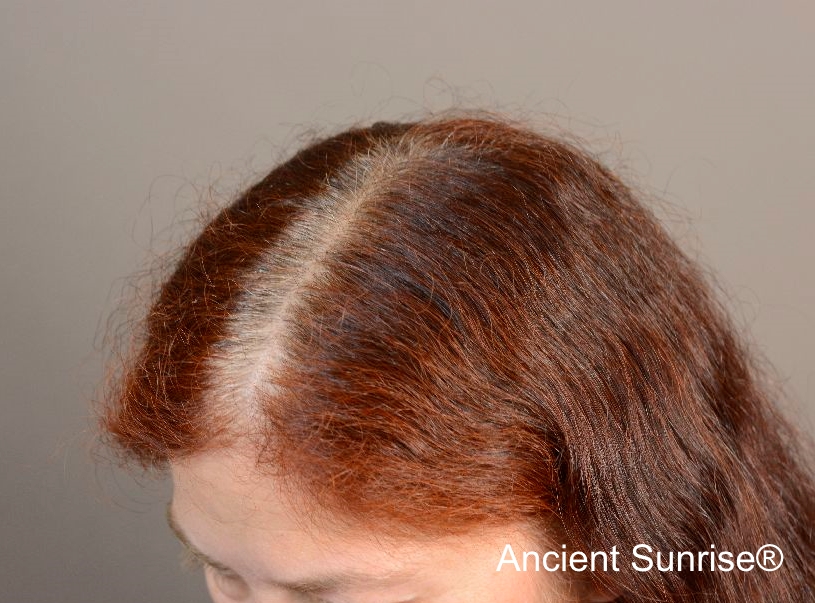
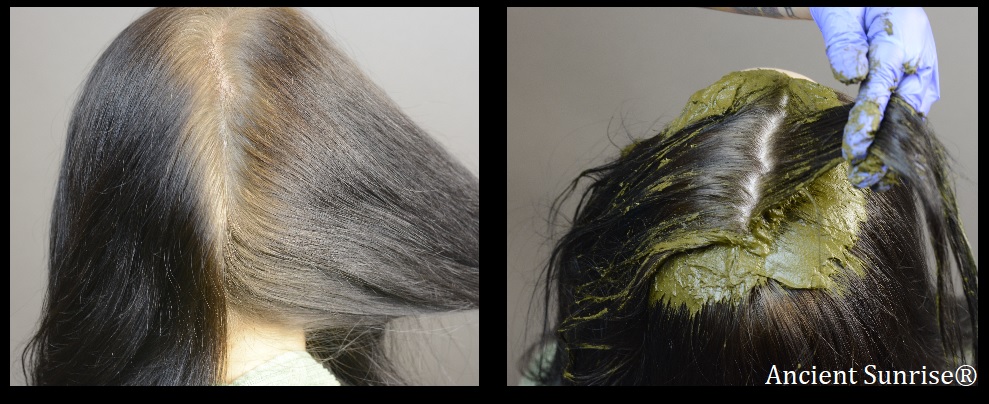
This person’s roots are mostly gray. Adding applying henna as lowlights would break up the root line.

Adding Cassia

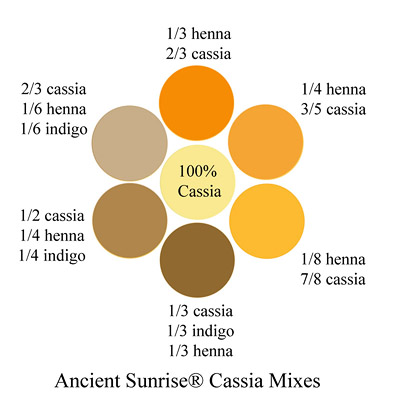
Another option when transitioning is to adjust the mix itself so it becomes lighter. Cassia works to dilute and lighten the resulting shade of a henna or henna/indigo mixture.

            For example, if your regular mix is equal parts henna and indigo for a medium brunette result, you can create a mix of equal parts henna, indigo, and cassia for a lighter brunette. The next time, increase your amount of cassia again. Keep your original mix ratio the same, only increasing the amount of cassia you add to your mix.

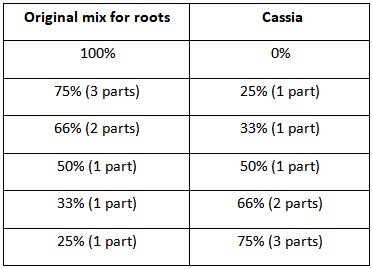
            Below is an example of how a person might adjust with cassia over time. Keep in mind that everyone’s mix and hair color varies; this is only one example.  Don’t hesitate to contact customer service for help with a custom transition plan. Be sure to ask about measurements to avoid mixing too much, too little, or in the wrong ratios.

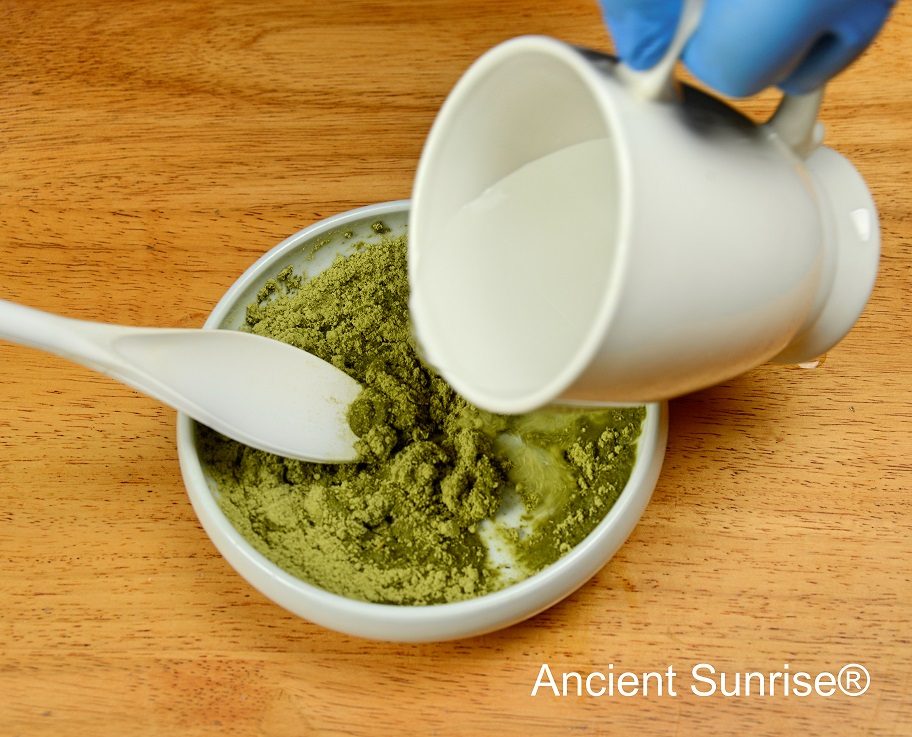
            Cassia should be dye-released with henna. Mix henna and cassia together and stir with an acidic liquid to create a paste, just as you would with henna. Cover your mixture and let it sit as normal. Mix and add your indigo paste just before applying.

            Feel free to experiment with test strands. When in doubt, always start lighter. If your root results are too light, you can always adjust afterward. For more helpful information about cassia mixes, be sure to read How to Dye Hair Blonde.

            In some cases, mixing with cassia leads to brighter or more golden-toned results. If you prefer a neutral shade my article on Cool and Neutral Mixes will help you keep your desired tone as you transition.

Lightening

As long as you have only used Ancient Sunrise® Henna for Hair products, it is safe to use a chemical hair lightener. Ancient Sunrise® plant dye powders have been tested for purity, and do not contain any metallic salts or additives that may be unsafe to lighten.

            You may choose to lighten the full length of the hair, or to have highlights put in as your roots grow, to blend away the line of demarcation. Be sure to conduct a strand test first to determine the resulting color and whether your hair can withstand lightening.

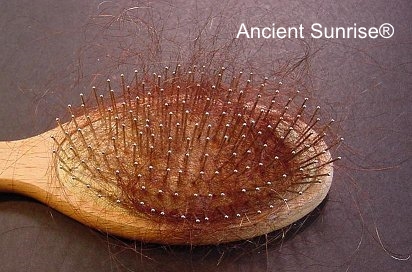
Gather hair from your brush to test with lightener. Having a professional lighten your hair is always recommended.

            If you have been using a mix containing indigo, it is particularly important to conduct a strand test first. Indigo does not always lift completely from the hair. Hair that has been dyed with mixes of 50% indigo or more may see a blue or green cast remaining after lightening. The degree to which this happens varies from head to head, and also depends on how many shades you plan to lighten. Sometimes this is subtle and can be toned away. If you have been doing a two-step process for jet black hair and wish to lighten to platinum blonde, more likely than not you’ll find it won’t be possible.

Hair that has been dyed jet black with a two-step process may turn blue or green when lightened.

            For more information about lightening over henna, read the Ancient Sunrise® Henna for Hair free e-book chapter on lightening.

Transitioning to Darker Roots

If you have chemically lightened your hair before applying henna, your root color may be darker than the length of your hair. The most straight-forward solution is to dye all of your hair with a mixture that will match your roots. This will result in a uniform color that blends seamlessly with your natural color.

            However, there may be reasons to perform a gradual transition. Perhaps you desire an ombré effect, or wish to be able to lighten your hair in the future.  For example, I currently have fiery red hennaed hair, and my natural hair color is virtually black. I like to play around with colors quite a bit, including fun, demi-permanent colors. If I were to use a two-step process to dye all of my hair back to black, I would have less flexibility if I chose to lighten in the future. I might not be able to achieve bright or pastel tones.

Henna as Highlights

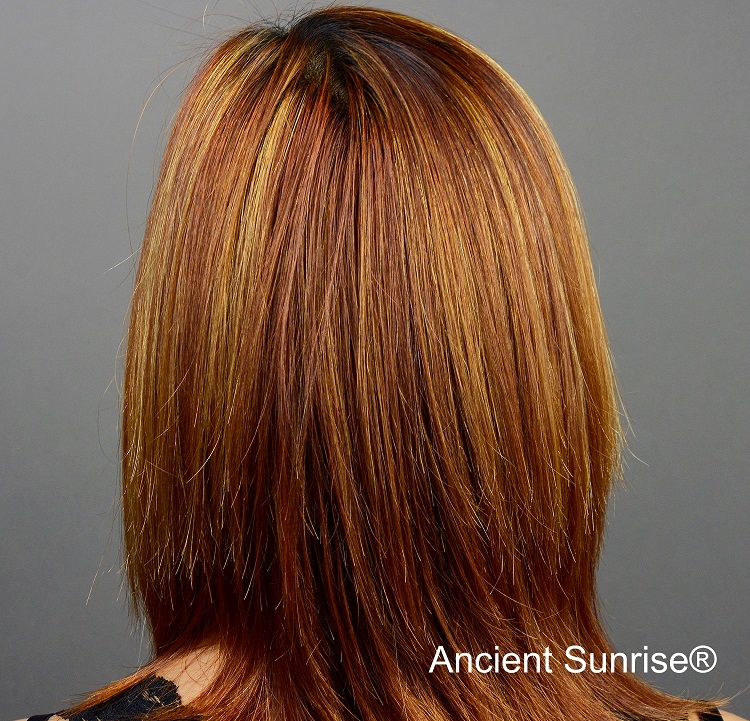
This technique is similar to the one described above, only backward. Instead of applying a henna mixture to create lowlights, have a stylist create highlights in your hennaed hair to break up the root line.  As your hair grows, decrease the amount of highlights. If you wish, you may continue applying henna between highlighting. This will create a range of “fire-lights,” giving your hair beautiful dimension. The Ancient Sunrise® Henna for Hair chapter on lightening covers this process in detail. 
            As mentioned above, be sure to conduct a strand test, especially if you have been using a mix containing indigo.

“Firelights” create depth and dimension while blurring the root line.

Condition and Strengthen Without Color

Even if you choose not to color your hair anymore, you can still use products from Ancient Sunrise® to keep your hair beautiful, shiny, and strong.

Cassia

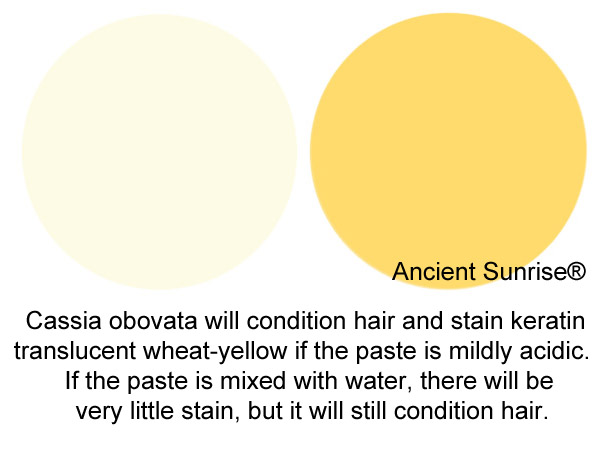
Cassia has similar conditioning properties as henna, with little to no color change on darker hair. To use cassia as a conditioner, simply mix it with distilled water only (no juice or fruit acid) and apply immediately. When it has not released its dye, cassia will condition the hair without affecting color. If your hair is naturally dark brunette or black, you can dye-release cassia for extra conditioning benefits without seeing a change in your hair color. To learn more about using Ancient Sunrise® Cassia for conditioning, click here.

Zizyphus

For those with very light hair, even cassia that has not been dye-released may impart a subtle golden tone. Zizyphus spina christi is another great option for keeping hair strong and healthy without changing its color. Zizyphus is a natural 2-in-1 shampoo/conditioner that both washes and fortifies the hair. Because it leaves a thin layer of plant wax on the hair, it is particularly good for hair that is subject to water, wind, and other harsh environmental factors. Zizyphus balances the hair’s moisture and gives it great shine. Read more about Zizyphus here and purchase here.

Rinse after a few minutes for strong, shiny hair.

As always, if you ever need advice or help, don’t hesitate to contact Ancient Sunrise® Customer Service.

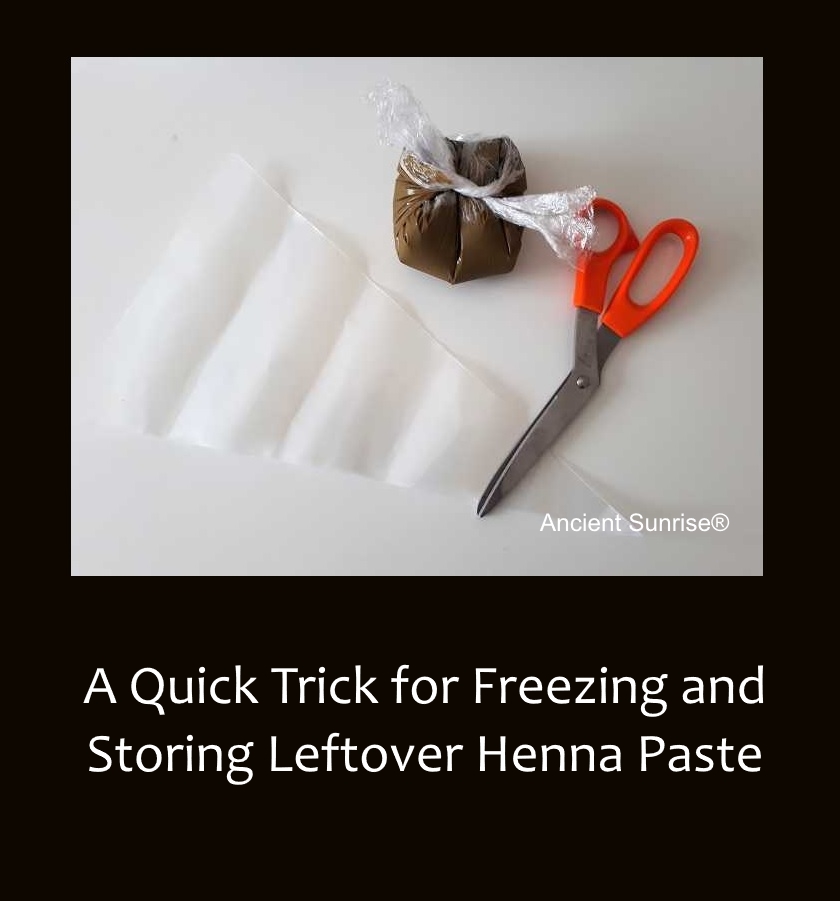
Highlights: A Quick Trick for Freezing and Storing Leftover Henna Paste

A customer messaged me about a trick she learned from using piping bags and frosting, and sent me instructions on how she did it. This is really cool! It makes storing and thawing portions a breeze, and clean-up is so simple. You can even re-use the same carrot bag over and over, because the inside of the carrot bag stays clean. Thanks, Jeannine!

Note: Before freezing, be sure to dye release your henna.

Here’s how.

Separating and Freezing

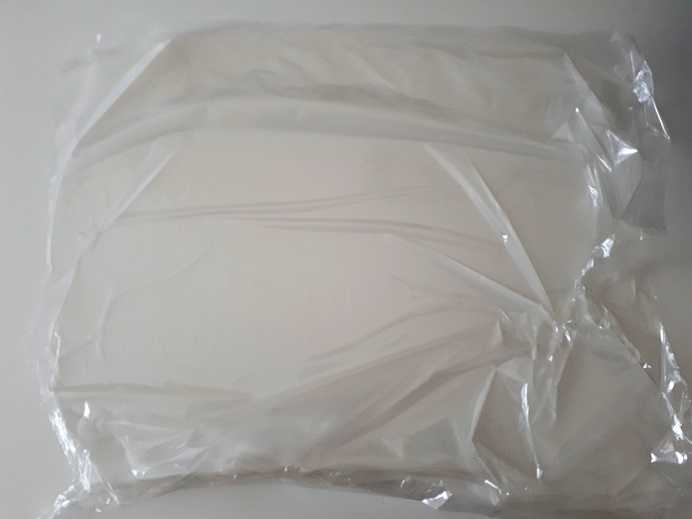
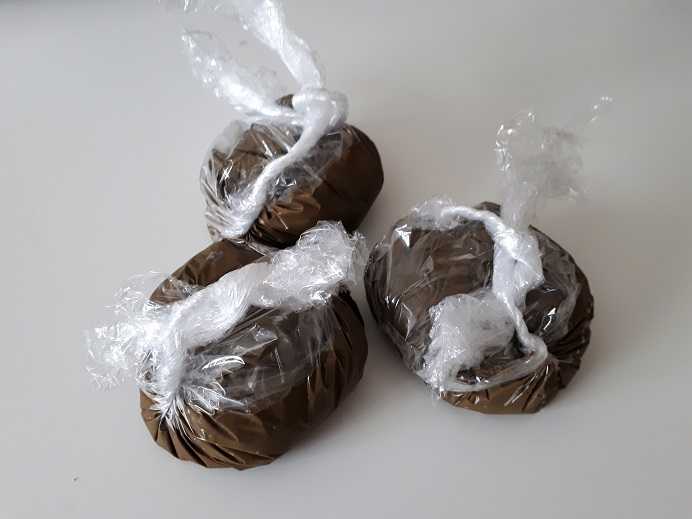
1. Lay a rectangular piece of plastic wrap flat on your work surface.

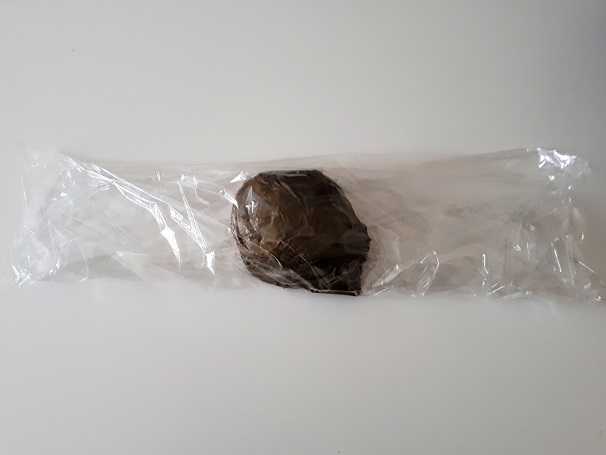
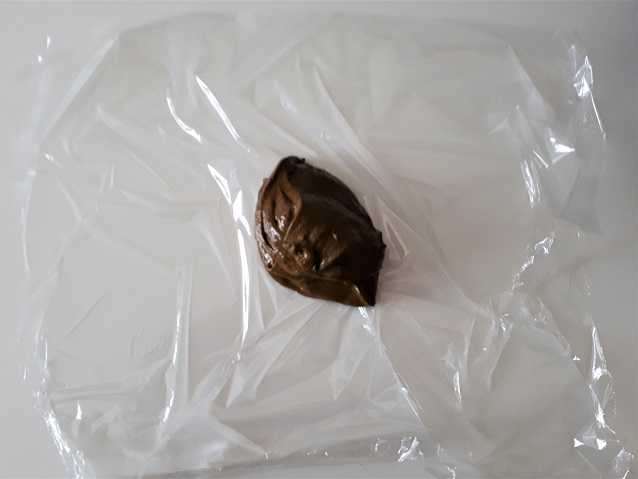
2. Spoon your henna directly into the center of the plastic.

3. Fold the top and bottom edges of the plastic over the paste so each edge overlaps the paste completely.

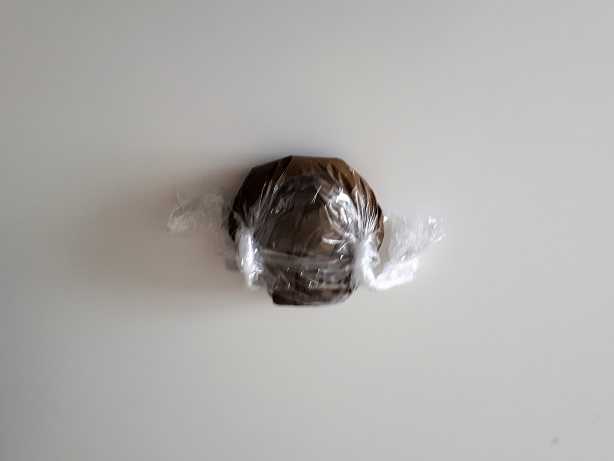
4. Pinch the open sides together and twist. You can hold the sides and twirl your paste lump until both sides are tightly twisted. Don’t worry, henna will not go flying.

5. Repeat until all your paste is wrapped, and store in the freezer. (Note: sometimes the dye from the paste can leech through thin plastic. I put a piece of wax paper down in my freezer where I stored the portions.)

Thawing and Filling

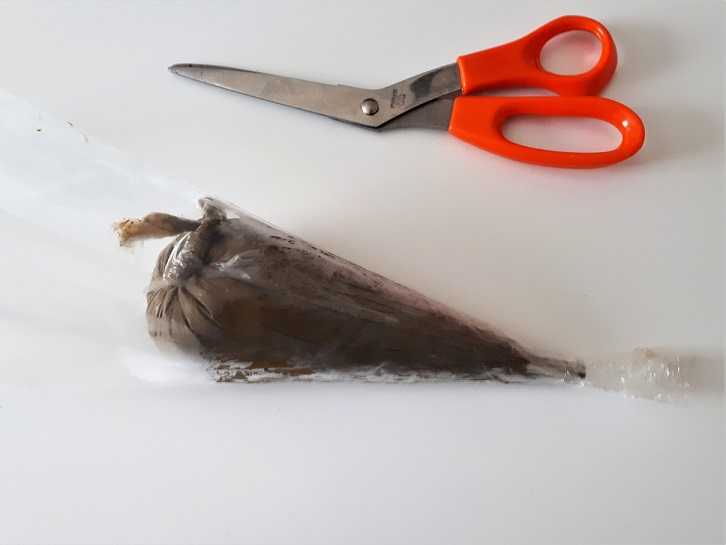
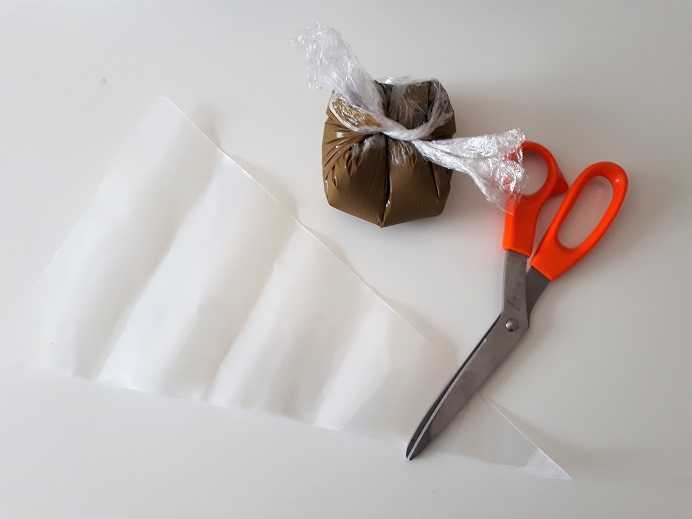
1. When you need to use your paste, pull out a portion and allow it to thaw. Cut the tip of a carrot bag.

2. Once the paste is thawed, cut the tip of a carrot bag and drop the portion in so that one twisted end can be pulled out of the tip. (I’ve learned that it might help to tape the twisted end to help it thread through more easily, like licking the end of a thread.) Pull gently until the portion forms to the bag.

3. Close the open end of the carrot bag with a rubber band or clip, and cut the plastic wrap twist where it sticks out.
4. If you do not use all of the paste, simply tape the end and store.

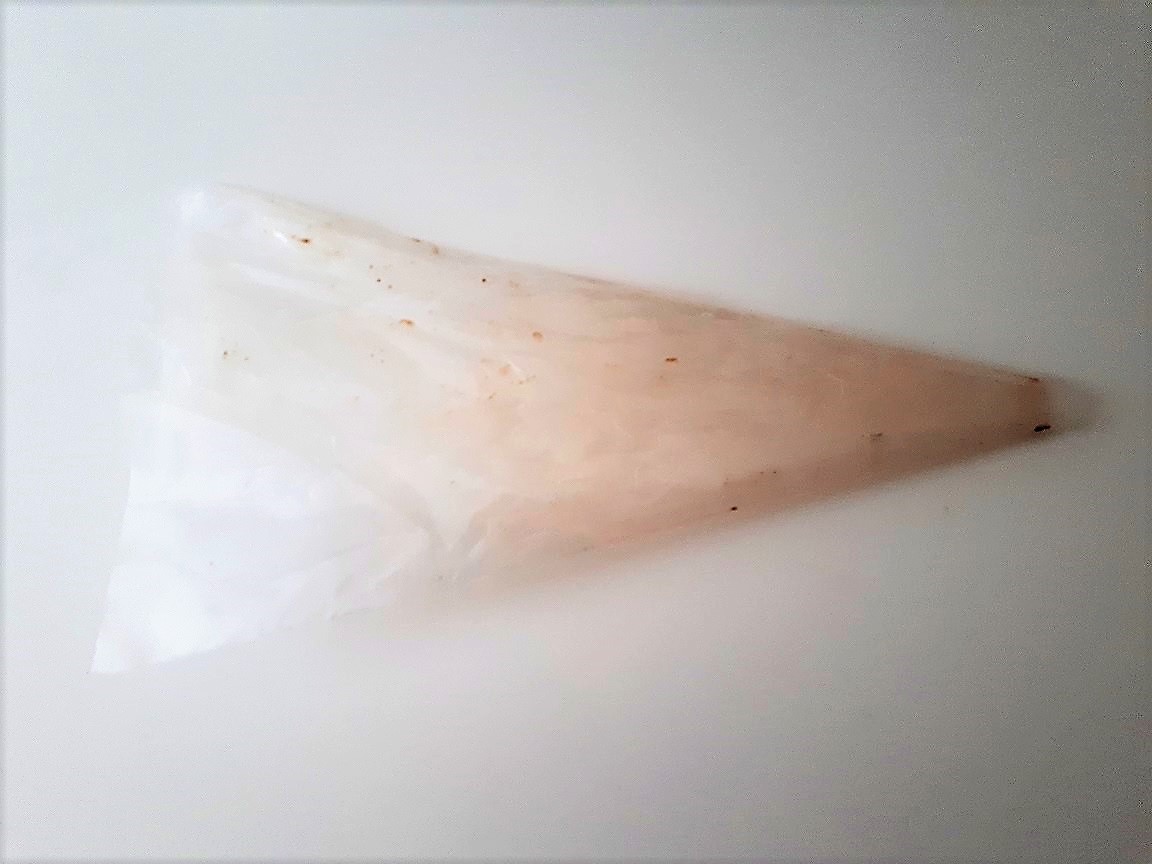
5. When the carrot bag is empty, simply pull out the plastic wrap, rinse the carrot bag if needed, and put it away for next time!

If you have cool tricks and tips you’d like to share and see posted in the blog, feel free to email us at info@mehandi.com with “tips and tricks blog suggestion” in the subject line.

Author: Rebecca Chou September 2017
Edited: Maria Moore August 2017

Full Coverage: Dyeing Roots and How to Rescue Resistant Roots

After the first initial application(s) of henna, there is no need to continue dyeing the full length of your hair each time. Because henna stains hair permanently and does not fade, repeated applications will darken the color over time as henna saturates the hair more and more. If you are not concerned with the darkening, or intend to darken the color, you are welcome to continue applying henna to the full length of your hair until you achieve the desired effect instead of just dyeing roots. It should be noted that your root area will be lighter.

If you are not concerned with darkening, or intend to darken the color, you are welcome to continue applying henna to the full length of your hair until you achieve the desired effect. Repeated applications will not cause damage; in fact, additional henna will continue to strengthen and thicken the hair.

Because henna stains hair permanently and does not fade, repeated applications will darken the color over time as henna saturates the hair more and more. If you are not concerned with darkening, or intend to darken the color, you are welcome to continue applying henna to the full length of your hair until you achieve the desired effect. Repeated applications will not cause damage; in fact, additional henna will continue to strengthen and thicken the hair.

However, if you are pleased with the color and intend to keep it as it is, keeping to root-only applications is an effective way to maintain your result. This cuts back on time and the amount of product needed. The first section of this article will review how to apply henna to the roots.

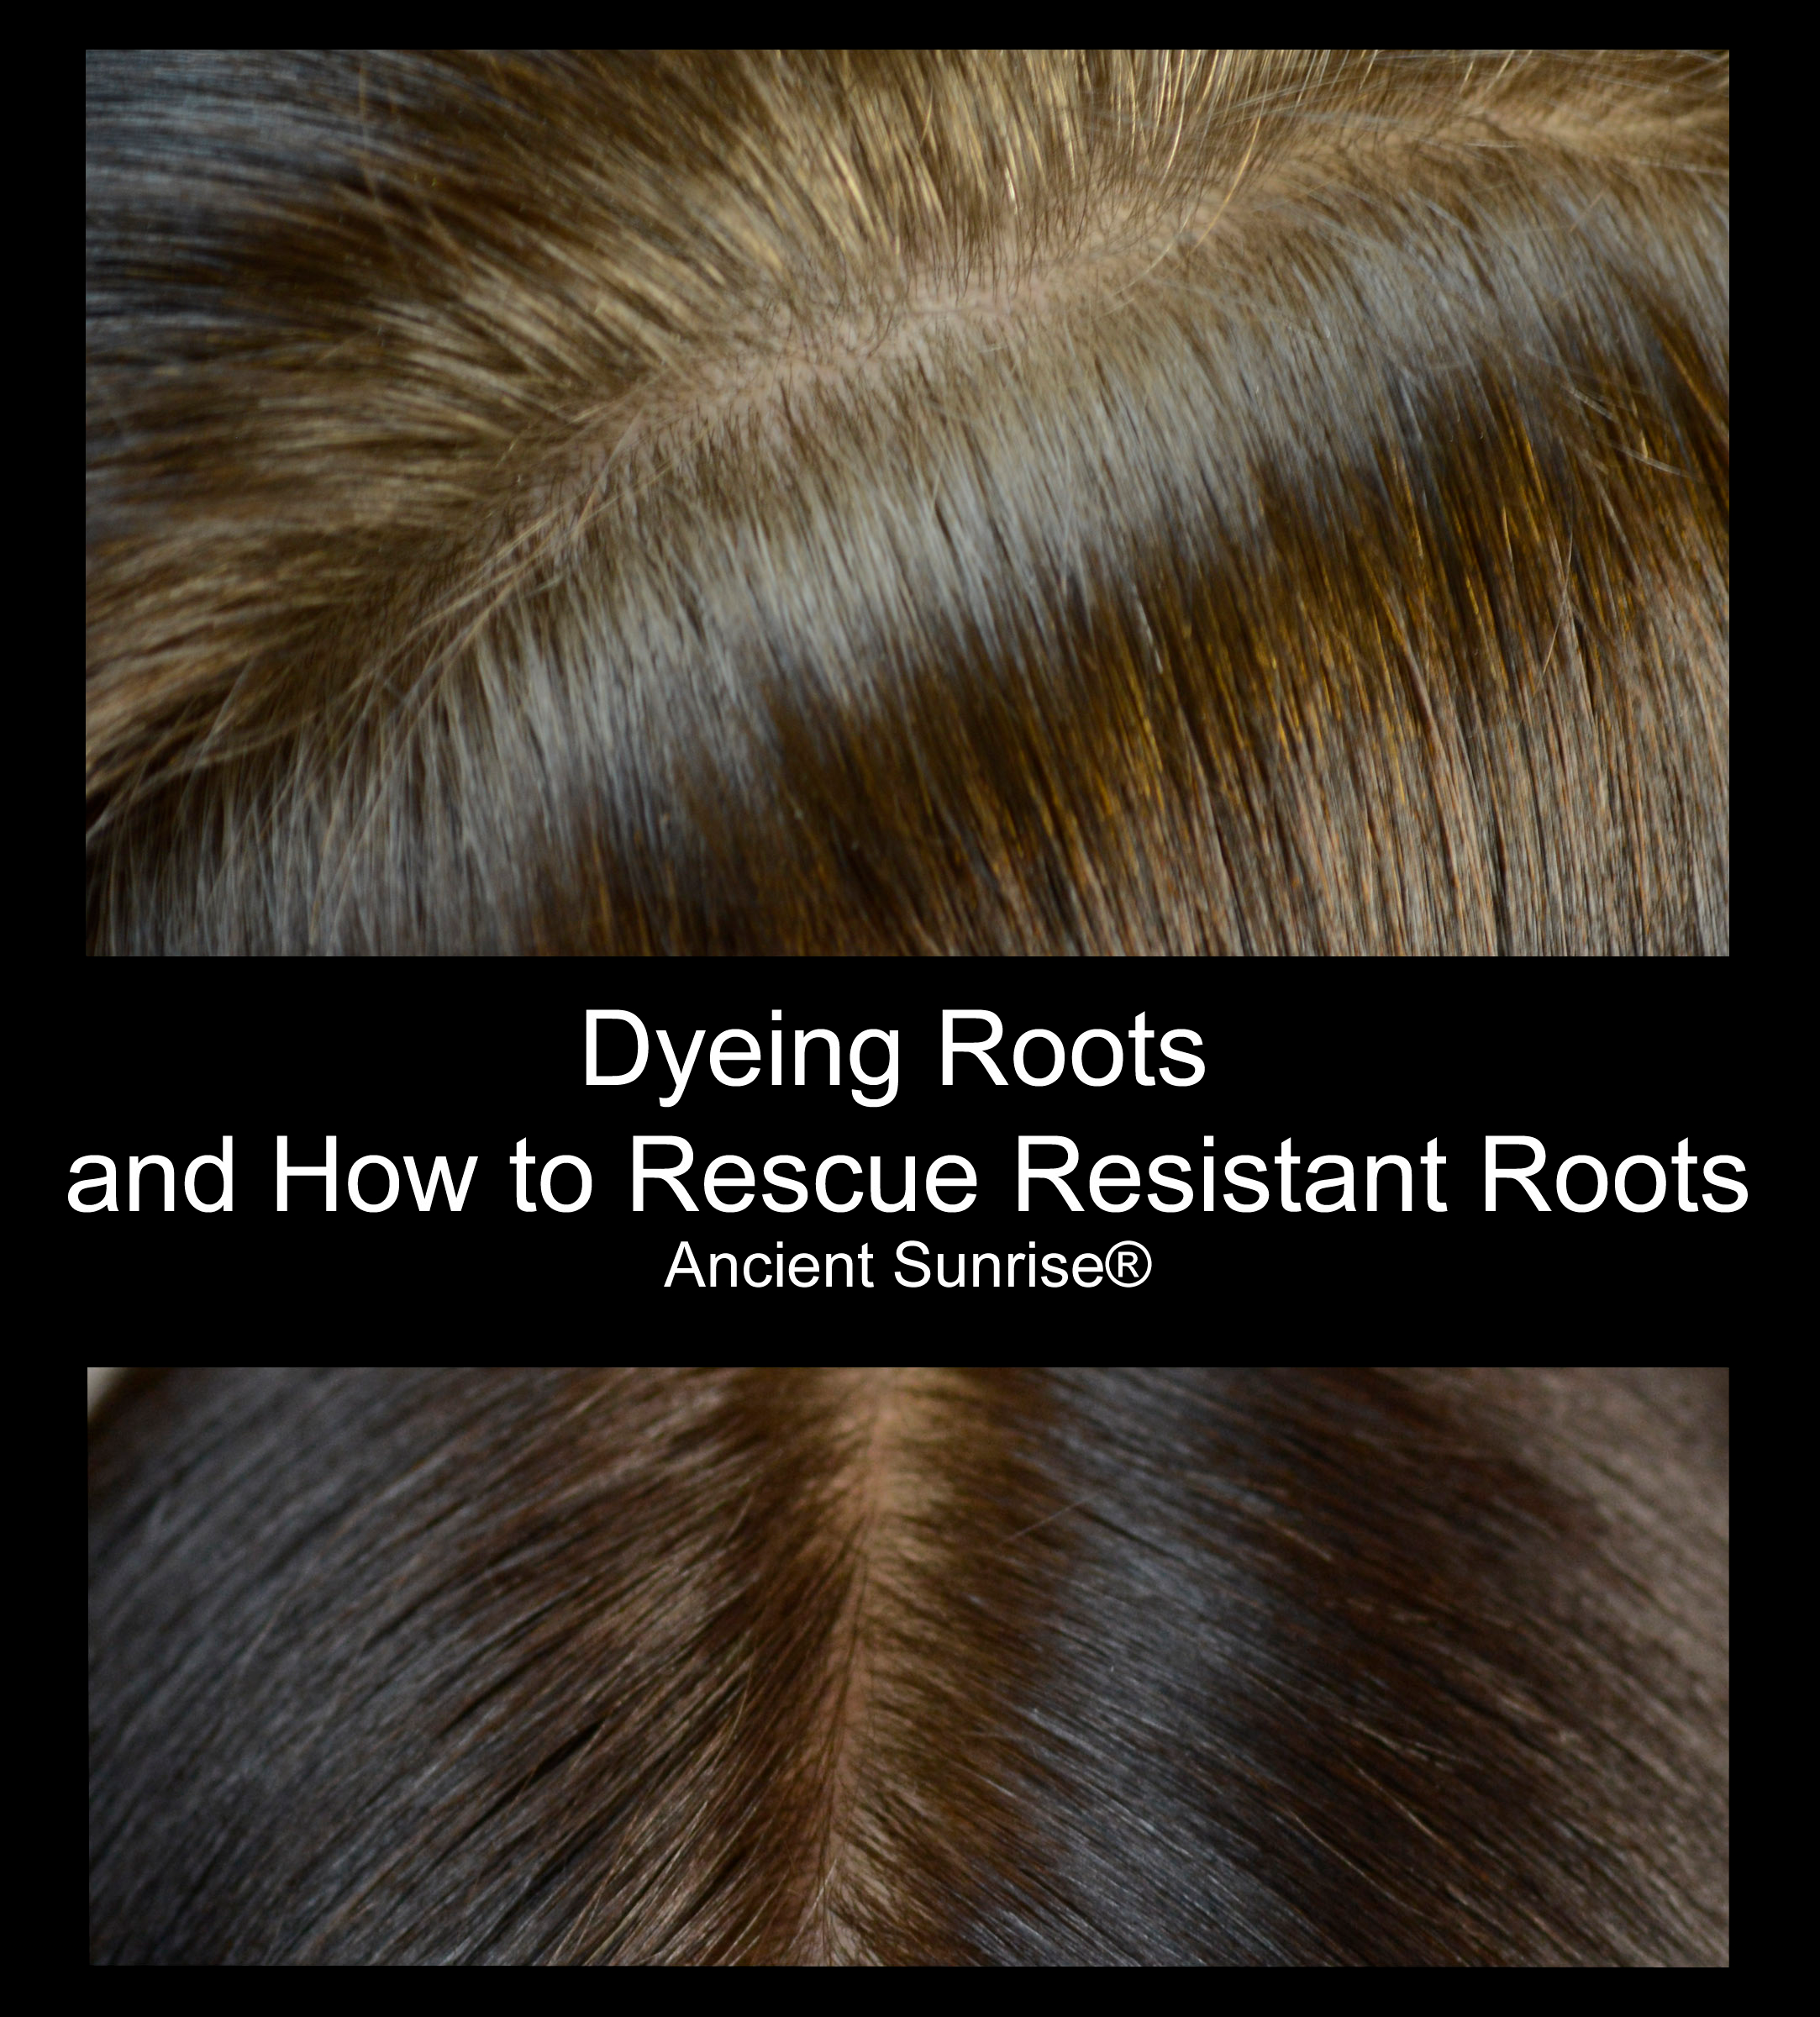
In some cases, henna users report their their henna or henna/indigo mix did not dye their roots sufficiently, leaving grays lighter, or a line of demarcation. The second section of this article explores potential reasons for roots and gray hairs appearing lighter than desired after a root touch-up.

How to Apply Henna to New Root Growth

Mixing for root applications is simple enough: Mix a smaller amount, keeping to the same proportions as a full head recipe. Most need anywhere between 30g-100g of powder for root touch-ups, depending on the length of your roots, the thickness of your hair, and the precision of your application. If you have a complex mix and need help converting it into a smaller quantity, feel free to contact the customer service representatives at www.mehandi.com.

Each henna user has a preferred method for root application. The carrot bag that is included in all Ancient Sunrise® Henna for Hair kits is useful for storing leftover paste in the freezer for future use on roots.

Note: Only henna and cassia mixes should be frozen. Indigo dye demises at freezing temperatures.

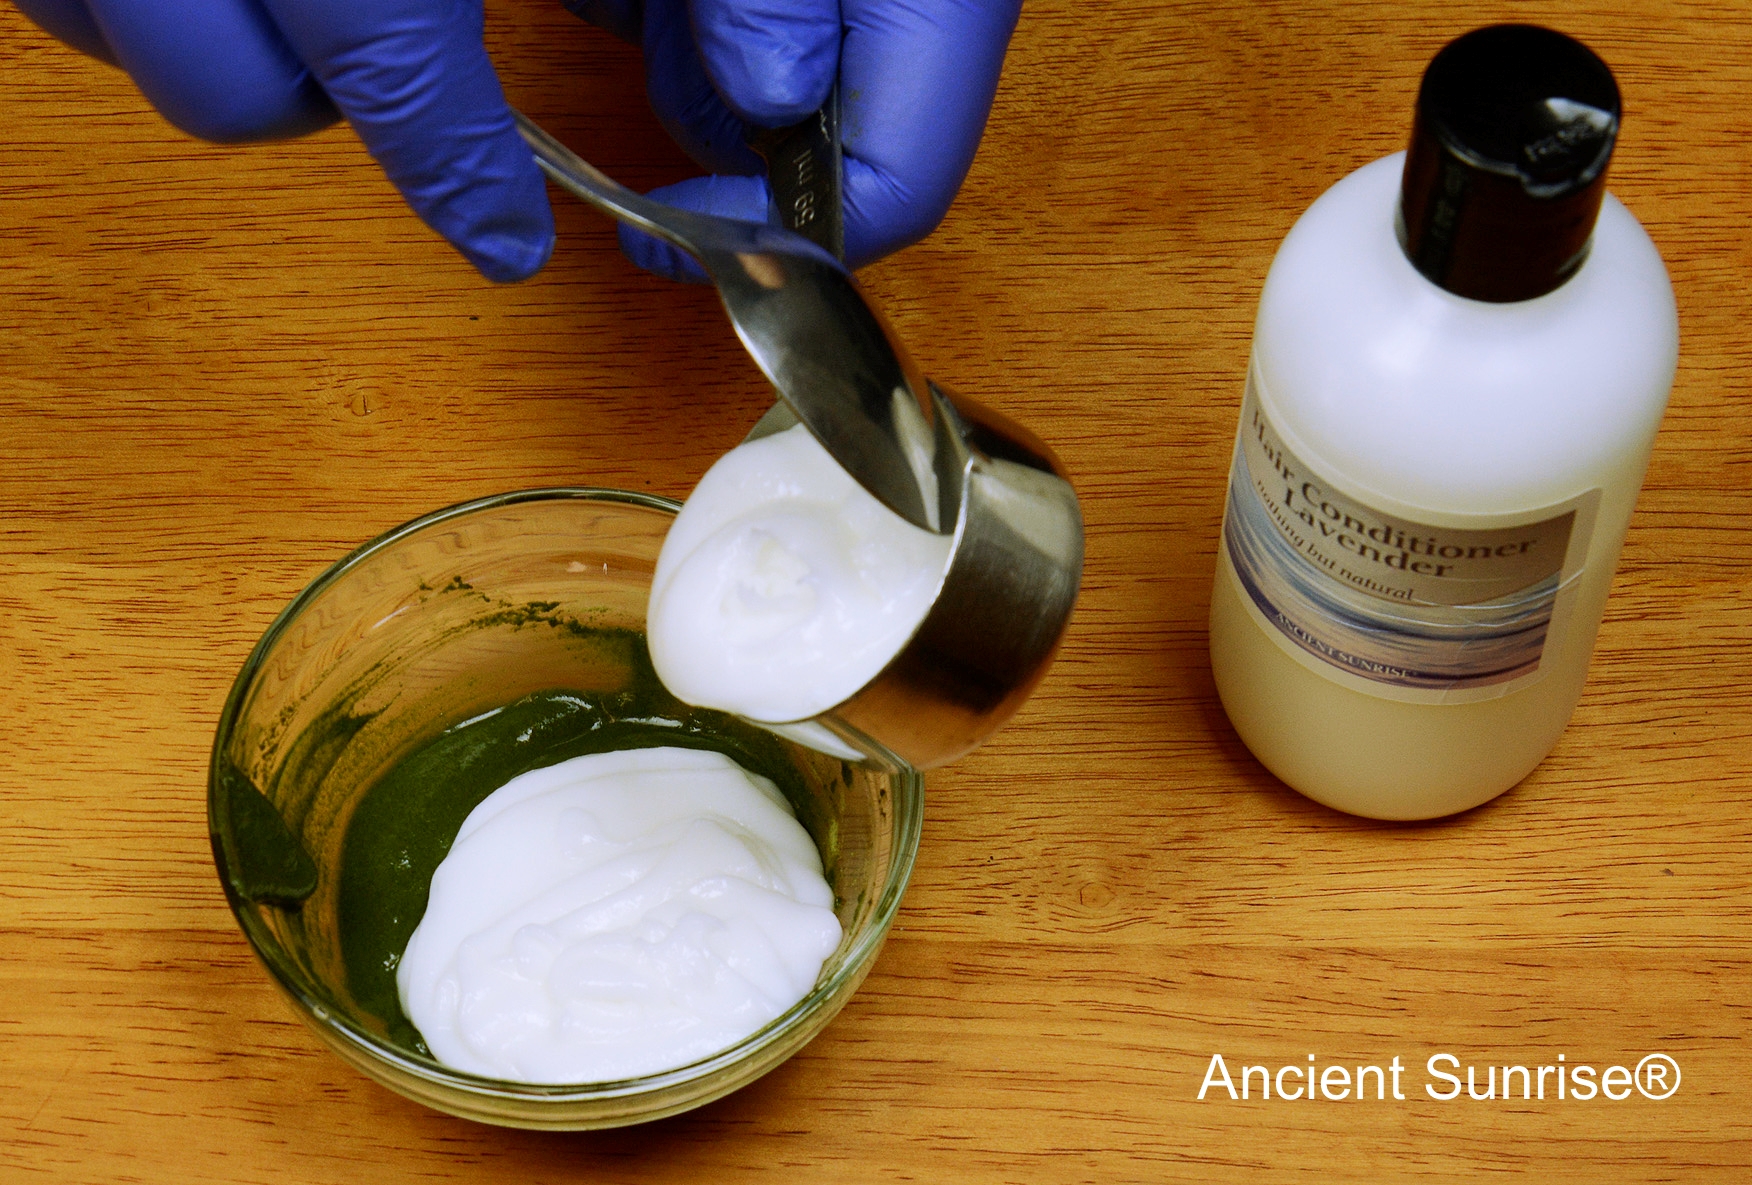
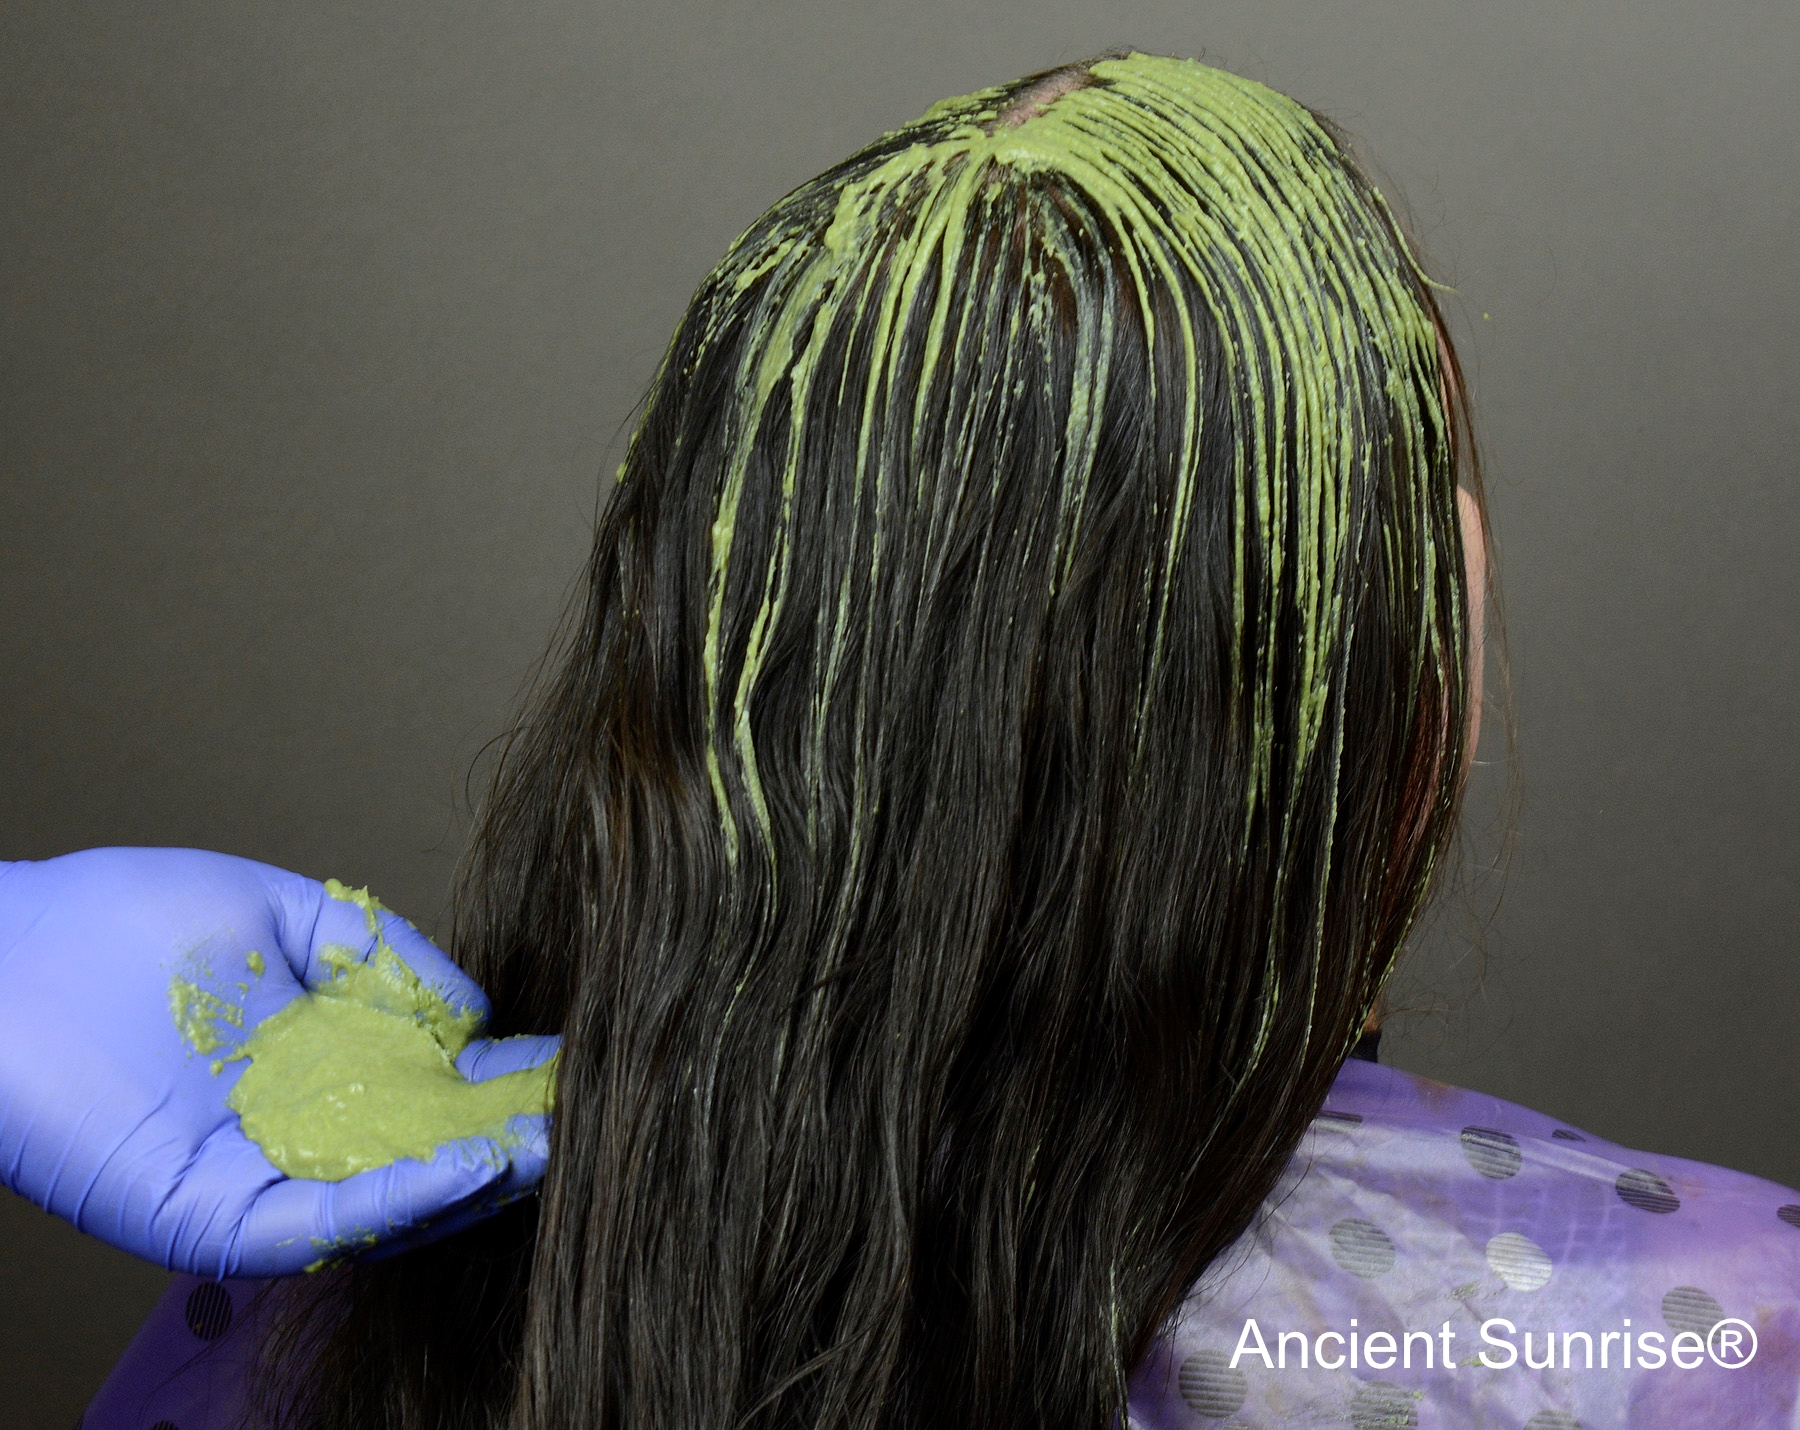
To use a carrot bag, simply fill the bag and tape or tie the end shut, snip the tip open, and squeeze the bag to apply the paste like frosting along your roots, using a gloved hand to push the paste into the hair and against the scalp. Others prefer to use a dye applicator bottle or condiment bottle with a pointed tip. This will work similarly to the carrot bag, and may be easier for some to grip and control. Another technique is to use a tinting brush, dipping it into a bowl of prepared paste.

Part hair into sections, and apply henna to roots section by section. Twist each section away before beginning the next one. Along the hairline at the forehead, temples, and neck. Wrap with plastic.

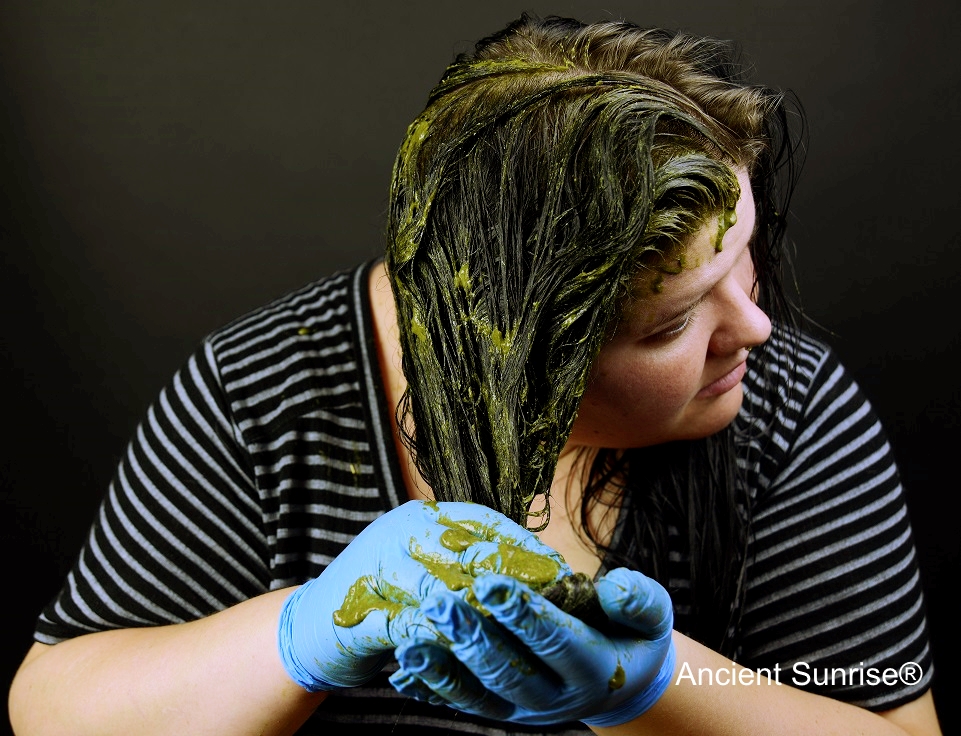
Using whatever tools you prefer, or gloved hands, apply the paste in sections, using the handle of a rattail comb to create a part a ¼ inch to the side of the area that has been hennaed, flipping the section over, and applying henna to the roots of the new section. Repeat until all roots are covered, wrap with plastic, and process for the same amount of time as a full-head application. A friend or a hand-held mirror may be helpful for applying to the back of your head.

A tinting brush, carrot bag, or your hands all work well for root applications. Use whatever is most comfortable for you.

Click here to watch a full-length demonstration by one of our Customer Service Representatives and licensed cosmetologist, Maria, applying henna to her mother’s roots.

Troubleshooting

Sometimes, customers report that their root application results are lighter than the rest of their hair, or even that some gray or white hairs were not fully covered, leaving a noticeable difference between their roots and the length of their hair. In the case of a henna/indigo mixture for brunette results, some may see that the henna has effectively stained the hair a copper color, but the indigo did not bind effectively, leaving the roots brighter and warmer than desired. There are several reasons for this happening, all of which are simple to fix or prevent.

In this photo, some roots were not completely covered, leaving them a lighter color. This is easy to fix.

Sebum and oils

The scalp continually produces sebum which serves to coat and protect the scalp and hair with a thin, waterproof layer. Some people naturally produce more sebum than others. The buildup of sebum will be highest closest to the scalp, then it spreads down the hair shaft. Indigo is particularly picky about the hair that it binds to. Any oils will cause the indigo to bind weakly, or not at all.

To ensure effective dye uptake, wash your hair very well with a strong detergent shampoo, taking extra care to lather and scrub at the scalp, and skip the conditioner. Do this just prior to applying henna. In the case of very resistant roots, washing the scalp with a small amount of dish detergent helps to strip oils and temporarily increase hair porosity for better results.

Mineral Buildup

The mineral content of tap water varies greatly from region to region. Hard water makes itself evident in the appearance of white residue on faucets, shower heads, and teapots. If you have hard water, you may be able to notice a metallic or sulfur smell when turning on the tap. Well water is more likely to contain a higher concentration of minerals. When you wash your hair, these minerals slowly collect onto the hair, causing a dry, brittle feeling and dulled color. The buildup of minerals blocks henna’s lawsone molecules from effectively entering and binding to the hair.

Ancient Sunrise® Rainwash mineral clarifying treatment removes minerals from the hair, leaving it brighter, softer, and easier to dye. It is a powder mixture of citric acid, ascorbic acid, and xanthan gum. Use it as a clarifying treatment prior to henna application, and periodically to keep hair bright, soft, and free of minerals.

Mix Ancient Sunrise® Rainwash with a small amount of distilled water and stir until you achieve a clear, gel consistency, similar to hair gel. Apply Ancient Sunrise® Rainwash evenly throughout the hair from root to end, and wrap with plastic. You may notice a metallic or sulfur smell while the product is in your hair. This is a sign that the Rainwash is working! It is dissolving the minerals out of your hair. For a first-time use, or for those with hard water, leave the mixture in the hair for 30-40 minutes. For periodic use (once every 1-2 weeks), leave it in for 10-15 minutes. Rinse out the product with warm water and a small amount of shampoo to ensure that the minerals are fully washed away.

Mix Ancient Sunrise® Rainwash with water to create a mineral-removing gel.


It is also important to make sure that the henna mixture itself does not contain unnecessary minerals. If you mix your henna with a fruit acid powder and water, or use water to dilute another acidic liquid, be sure to use distilled water. This will ensure that there are no minerals in your paste which might inhibit dye uptake.

Virgin Hair and Resistant Grays

The hair is healthiest at the roots, because it has not yet had time to incur damage. The cuticle lies flat and the surface is smooth, making dye uptake more difficult. Gray hair grows quickly, especially at the temples and the crown of the head. Because gray hair contains no melanin, it may require stronger, and longer dye applications, or more than one application to fully cover.

Washing the roots with a strong detergent such as dish liquid can help to temporarily dry out and “rough up” the cuticle so the roots can better absorb dye. If you use a henna/indigo mix, or a two-step process and see that the indigo isn’t binding effectively, add a small amount of table salt to your indigo when mixing it. One teaspoon of regular table salt per 100g of indigo is enough. Be sure not to use sea salt or Himalayan salt, as these contain additional minerals.

Be sure you are using the correct plant powders for resistant gray hair. Ancient Sunrise® Rajasthani Twilight Henna has a higher dye content for better saturation of color. Ancient Sunrise® Zekhara Indigo is finely sifted, and makes for better coverage and deeper brunettes.

Indigo and Oxygen

The indoxyl molecule in freshly mixed indigo paste is picky. It prefers hair that is completely free of oil and mineral buildup. Indoxyls will quickly bind to oxygen in the air to form indigo, if it does not have hair to bind to. It is essential to use the indigo as quickly as possible once it is mixed with distilled water. If you tend to apply your paste slowly, or have a lot of hair, split your prepared henna paste into portions, and mix only enough indigo for each portion. Mix new indigo only after you have used up each portion.

Indoxyls are intermediary molecules that bind with oxygen to become indigo. Oxidizing turns the molecule’s color from green to blue. When used in he hair, this reads as the brunette tones deepening over subsequent days.


Once the paste is applied, wrap your hair well with plastic. Because the temples and front of the hair line are most often the problem areas for coverage, it is helpful to apply an extra layer of paste to these areas before wrapping, and then using a gentle medical tape to seal the plastic down around your forehead and side burns to prevent exposure to air.

Mix smaller portions of henna and indigo at a time to prevent exposing indigo paste to oxygen for too long.

Orange Roots

You may know by now that henna goes through a period of oxidation during the first week after application. When using a mix that is all or mostly henna, it is perfectly normal for the color to appear too bright for the first few days. Indigo also undergoes a period of oxidation, sometimes even appearing to have a greenish hue, before settling along with the henna to the desired shade.

Henna Oxidzing
Hair dyed with a henna/indigo mix darkens during the first two weeks.

If your roots are consistently too bright, and remain that way after a week, consider switching your fruit acid, or adding more indigo. Fruit acids like Ancient Sunrise® Amla and Ancient Sunrise® Nightfall Rose fruit acid powders help to lessen the brighter, brassier tones by muting and cooling them. Ancient Sunrise® Malluma Kristalovino fruit acid powder pushes the henna color down a few shades, making for deeper auburns and brunettes.

If you wish to try adding more indigo to your future mixes, increase the amount by just a spoonful or two at a time, until you achieve the color you desire. Adding too much indigo too quickly can cause the hair to go darker than you may like.

Final Tips

Heat Helps

Processing with heat will help for a strong bond between dye molecules and hair. Sit outside on a warm day, cover your head with a warm cap, or periodically aim a blow dryer at your wrapped hair for a few minutes at a time. If you have access to a bonnet dryer, sitting under the dryer will cut processing time in about half.

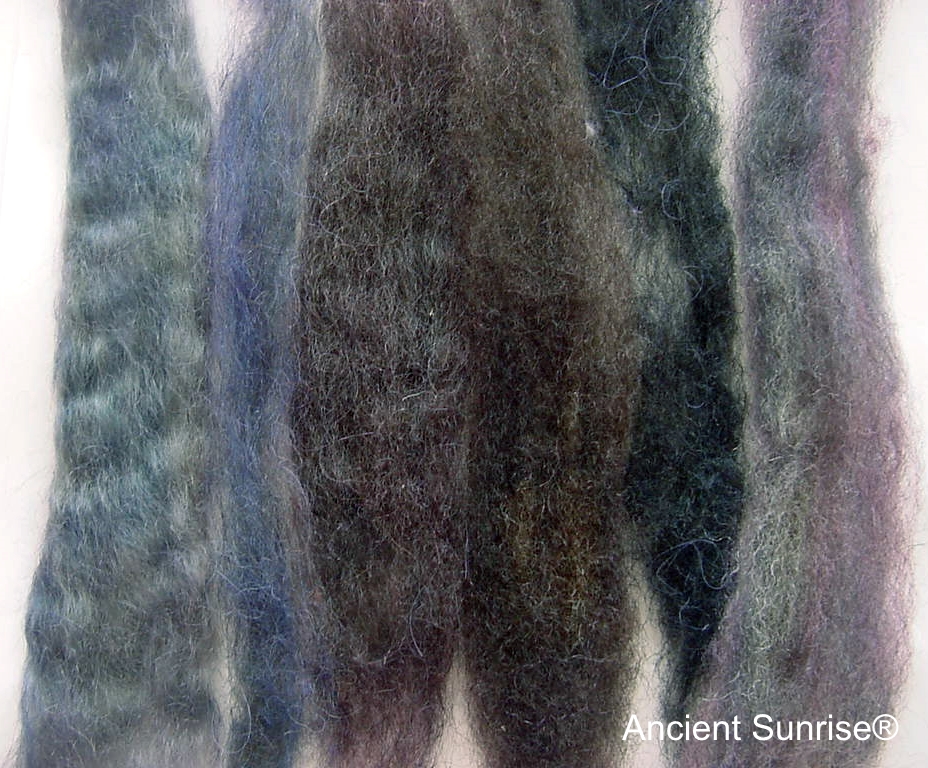
Heat will also speed up oxidation and darken the color once you have rinsed the paste from your hair. Gentle heat will work more slowly, whereas a styling tool such as a straightener or curler will cause the color to deepen noticeably. A quick solution to darkening undesirably bright hair is to expose it to heat. Be aware that the darkening caused by heat is not reversible.

This mohair sample was dyed with henna, then heated with an iron on one end and darkened as a result.

Add More Indigo

Indigo Gloss

An indigo gloss is when you mix indigo and cassia together to tone mixes that are not darken enough, are too bright, or too orange/red. You read in more details about toning mixes in these blogs: Toning Henna – Part 1 and Toning Henna – Part 2.

Conditioner and Indigo

While some folks prefer to use conditioner mixed with indigo, we’ve found that this is not very effective. Most customers who have attempted this have seen little to no change. Any test that we’ve done has shown no changes.

An indigo gloss can temporarily bump the color a few shades darker.

Full Strength Indigo

To fix a more noticeable contrast, such as bright orange roots and deep brunette length, dab full-strength indigo paste (not mixed with conditioner) into the lighter areas, cover, and rinse after 10-15 minutes. Be sure that your hair is clean and free of oils before doing this. Do not leave indigo on for too long; indigo alone on recently hennaed hair will dye hair black, such as in the two-step method.

Do not apply indigo to hair that is still completely white, gray, or a pale yellow. If there are areas where henna did not stain the hair, reapply both henna and indigo. Indigo alone on light hair will result in green and blue tones. Keep in mind that unless the result of your root application is several shades lighter than the length, it is best to wait a week before attempting adjustments. Oftentimes the color will deepen and blend on its own during oxidation.

Indigo alone on light hair will dye it blue tones.

Reapply

If there is little to no color change after henna, and a stark contrast between new growth and length, feel free to reapply as soon as you’d like. There is no waiting time required between henna applications, and no harm in using henna frequently.

This model’s roots did not dye evenly, leaving some lighter. She reapplied her mix in the areas where it was needed.

Feel free to contact the customer service representatives at www.mehandi.com if you have any additional questions of concerns. They are available via phone online chat, and email, and specialize in custom formulas and troubleshooting.

Author: Rebecca Chou August 2017
Edited: Maria Moore August 2022